 |
||
|
|
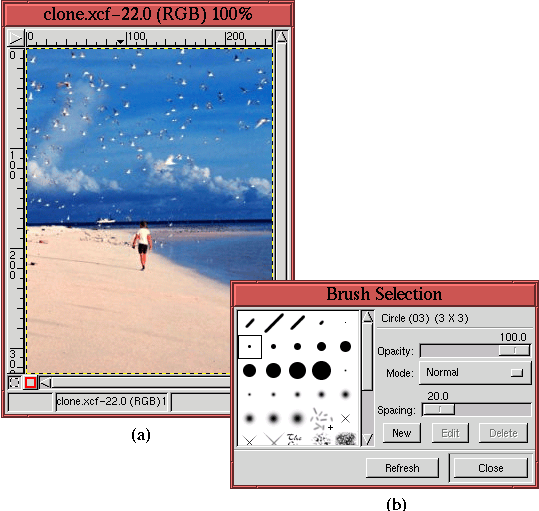
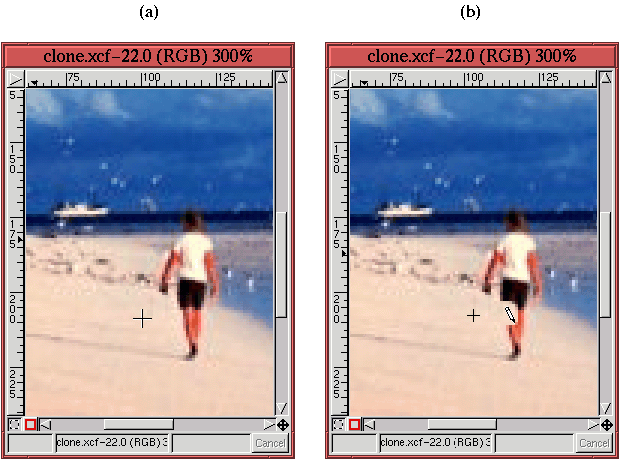
Figure 6.29(a). Notice the small + cursor on it. The cursor shows the center of the image source reference patch that will be used to cover other, undesirable parts of the image. The size and character of the patch around this point is controlled by the brush size and type. Selecting the Clone tool from the Toolbox, the image source reference point is specified by Control-clicking on it. Now, when (simple) clicking and dragging on another part of the image, the neighborhood around the reference point is copied to the new mouse location. If the choice of reference point is made carefully, it can be made to look as if the foreground is being removed to reveal the natural background. The effect is shown in Figure 6.30(b), which shows part of the person's leg being removed. (Don't worry, the process is completely painless, and no one was harmed to present this example.) The pencil icon is over the region being covered, and the size of the region being affected is equal in size to the area of the brush chosen from the Brush Selection dialog. Note that a smaller + sign cursor is visible in Figure 6.30(b). While painting with the Clone tool, the location of the reference patch is indicated by this cursor. The + sign moves in tandem with the mouse cursor, always remaining exactly the same distance away, as long as the mouse button is held down. This feature aids in producing a more natural looking result because different parts of the image are being used in the cover-up.
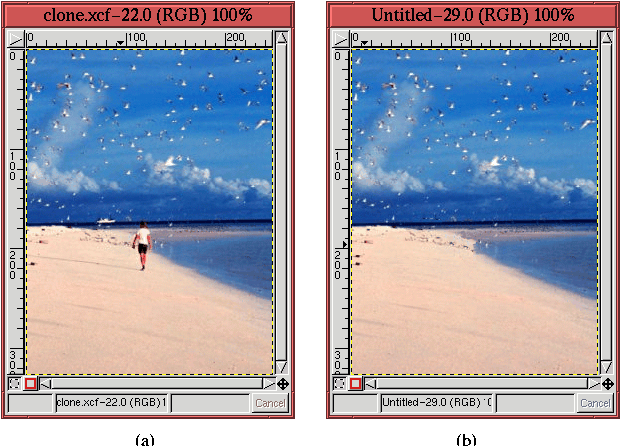
Figure
6.31 shows the final result of using the Clone tool for this example.
Figure 6.31(a) shows the original image, and Figure 6.31(b) shows that the person has been completely removed, including his shadow! The boat seen on the horizon in the original image has also been removed. Good examples of practical uses for the Clone tool are presented in Sections 7.4 and 7.5.
|
|
||||||||||||||||||||||
| Published under the terms of the Open Publication License | Design by Interspire |


