 |
||
|
|
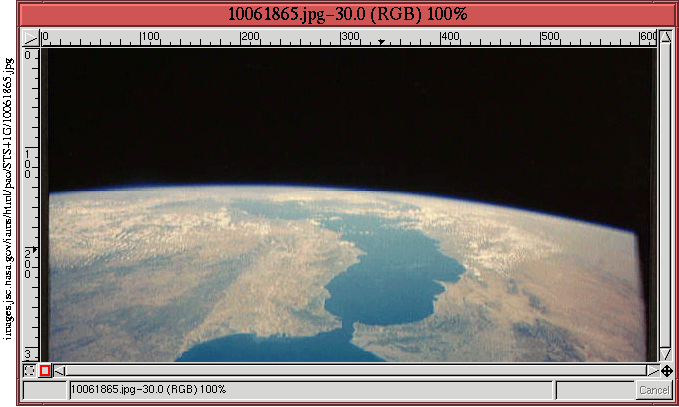
on the background image shown in Figure 9.6.
The first step is to prepare the images in
Figures
9.5 and
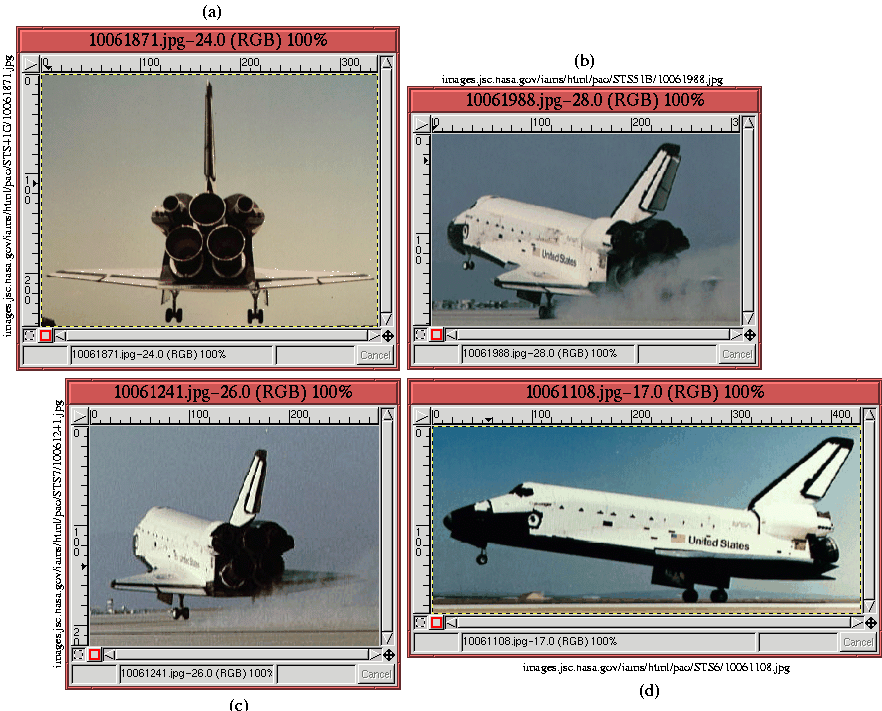
9.6. The image in
Figure
9.6 is cropped to the desired size,
and each of the shuttle images in Figure
9.5
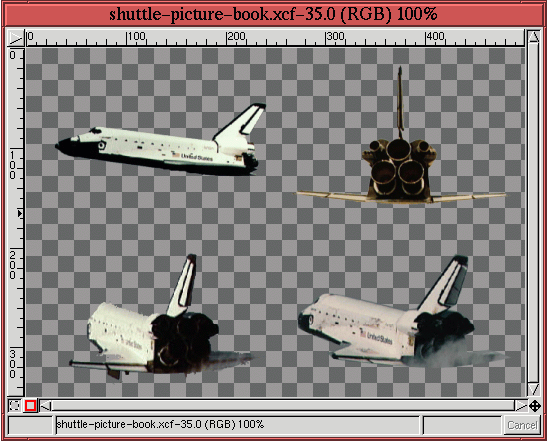
are selected from their backgrounds and placed into individual layers
of a single image, as shown in Figure
9.7.
Placing the shuttle images into a single clip book is a technique also used in Section 7.1, and it is a convenient tool for organizing, using, and re-using a collection of images that are to be composited together. The next step composites the shuttle images from Figure 9.7 into the cropped background image from Figure 9.6. The goal is to do this in a way that makes the shuttle look as if it is flying on a trajectory from its orbit in space to a landing point on the surface of the earth. The approach is to show the shuttle at various aspects while it distances itself from the viewer.
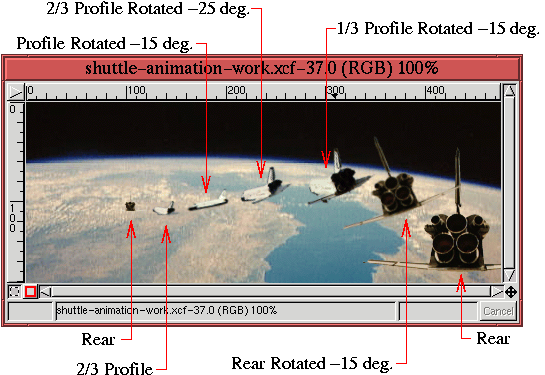
The primary tools used to achieve the desired result are the Transform tool and the Move tool. Figure
9.8
shows how the shuttle images from Figure 9.7 are composited onto the background image. Each of the seven shuttle images is obtained by copying and pasting from the shuttle picture clip book. Each shuttle image is scaled to the appropriate size using the Transform tool and positioned with the Move tool. In some cases, the Transform tool is also used to rotate the shuttle. These operations are repeated until the desired composition is achieved. Because each shuttle image is on a separate layer, I was able to fine-tune the positioning and scaling operations to my satisfaction.
To give the shuttle landing a final special effect, an additional
layer showing a reflected glint of light is created. This is intended
to represent the shuttle entering the earth's atmosphere. The effect
is created by duplicating the background layer of the earth and
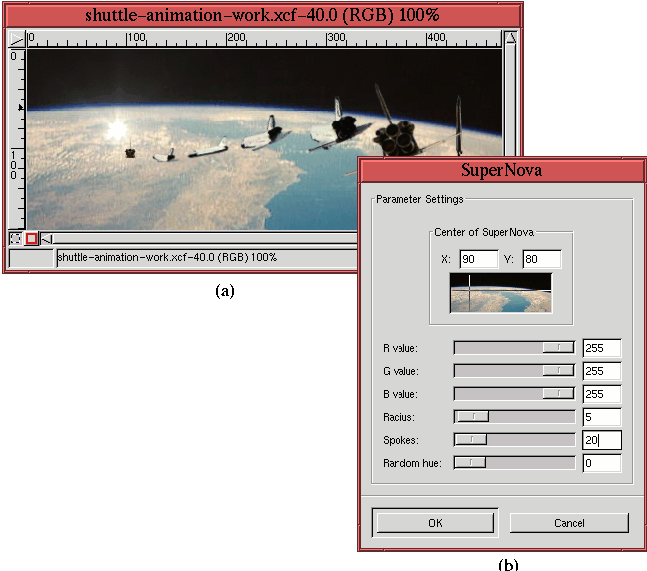
running the SuperNova filter found in the Image:Filters/Light Effects menu.
The dialog for this filter is shown in
Figure
9.9(b).
The dialog allows the choice of color for the SuperNova effect, which is set by entering numeric values for the red, green, and blue components. The values shown in Figure 9.9(b) produce a white flash with a radius of 5 pixels and 20 spokes or rays. The filter allows the position of the effect to be interactively chosen, which is done by clicking and dragging the cross hairs in the image thumbnail to the desired location. Alternatively, you can enter the position numerically in the X and Y entry boxes. The result of using the filter is shown in Figure 9.9(a).
The animation is now almost complete. One more step is necessary
before it can be saved as a GIF file. The current state of the
animation consists of the background, a duplicate background with the
SuperNova effect, and seven transparent layers with various shuttle
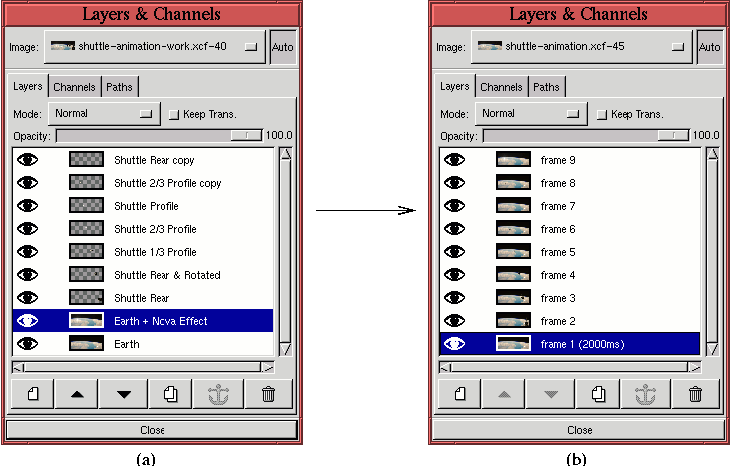
images. This is shown in Figure
9.10(a).
The problem with Figure 9.10(a) is that neither the Replace nor Combine modes will create the desired animation with the layer frames as shown. In Replace mode, the animation would show a frame of the earth, then a frame with the earth showing the SuperNova effect, and then seven frames, each empty except for the shuttle. Alternatively, the animation obtained by using the Combine mode would show the earth, then a SuperNova effect on the earth, followed by a sequence of shuttles that appear one at a time but that only disappear at the end of the animation sequence. Neither of these is what we want. To produce an animation that runs correctly, it is necessary to give each layer frame a copy of the Earth layer. This is done by duplicating the Earth layer seven times and then merging each copy with a shuttle frame. Section 2.7.1 describes how to do this using the Merge Down function. The result of merging the seven background layers with the seven shuttle frames is shown in the Layers dialog illustrated in Figure 9.10(b). Also shown, the layer with the SuperNova effect has been moved to the top of the layer stack (the final animation frame), and the timing information of the layer at the bottom of the stack (the first animation frame) has been set to 2000ms. Thus, the final animation sequence remains in the bottom layer for 2 seconds, followed by a sequence of eight frames showing the shuttle's trajectory into the atmosphere, and, finally, showing the top frame, which displays the burst of light from the SuperNova effect. The following figure illustrates the entire animation sequence:
 (Note: The animation can be turned off by clicking on the Stop button of your browser.)
|
|
||||||||||||||||||||||
| Published under the terms of the Open Publication License | Design by Interspire |


