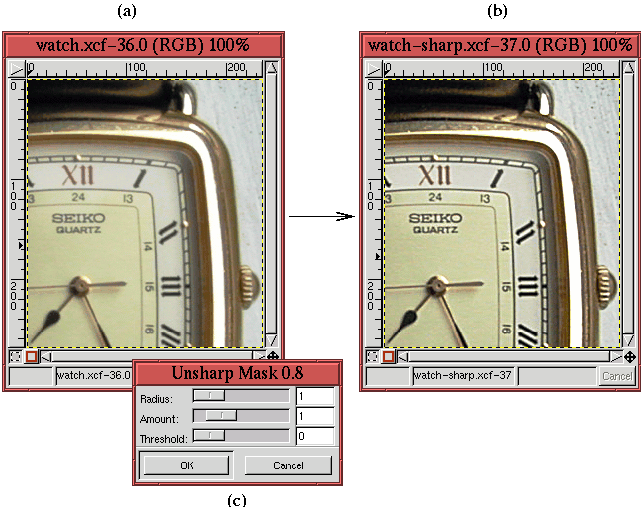
Figure
6.34
Figure 6.34:
An Example of Applying the Unsharp Mask
 |
illustrates the application of the
Unsharp Mask to a more
representative image. Figure
6.34(a) shows
the original and Figure
6.34(b) the result
of applying the mask. The parameters chosen to perform the sharpening
are shown in the
Unsharp Mask dialog illustrated in
Figure
6.34(c).
The choice of parameters used to obtain the results in
Figure
6.34 was obtained by trial and
error. Using Undo (C-z) in conjunction with the keyboard
shortcut that recalls the last applied filter (A-S-f ), it was possible to apply the
Unsharp Mask repeatedly, experimenting with values. In this
way, it was possible to obtain just the desired effect.
What parameter values should be used with the Unsharp Mask? The
answer depends on the image, of course. However, one rule of thumb is
the Radius of the mask should be small--2 to 4 pixels wide. This is
because the halo and shadow created by the Unsharp Mask should
be subtle. On the other hand, the Amount should be as much as you can
get away with without overly accentuating noise. This is typically in
the range of 75% to 150% depending on the pixel values in the image.
