3.3.9 The Border Function
The Border command, found in the Image:Select menu,
replaces a selection with just those pixels within a specified radius
of the selection edge. Thus, this function creates a selection of the
border around the previous selection's edge. This command is a
combination of the two functions Shrink and Grow. In
particular, if A represents the set of selected pixels obtained by
applying Grow to a selection and B represents the set obtained
by applying Shrink, Border produces the set that could
otherwise be obtained by doing A-B (see
Section
3.2 for more on combining
selections). The width of the border is specified by the border
dialog.
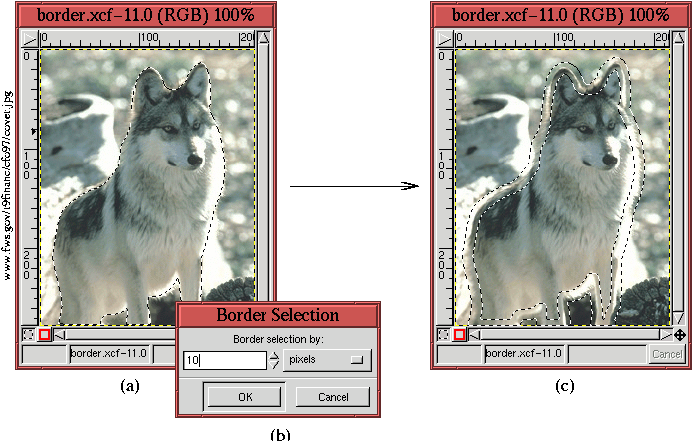
Figure
3.16(a)
Figure 3.16:
The Effect of Border
 |
illustrates an image with a selection, and
Figure
3.16(c) shows the result of applying
Border. The value chosen for the border is shown in the associated
dialog, illustrated in Figure
3.16(b). Note that
the dialog contains a menu that allows the border width to be
specified in a variety of different units. The default unit is pixels.
Border is particularly useful for refining selection edges. An
example of using Border is presented in
Section
7.4.
