 |
||
|
|
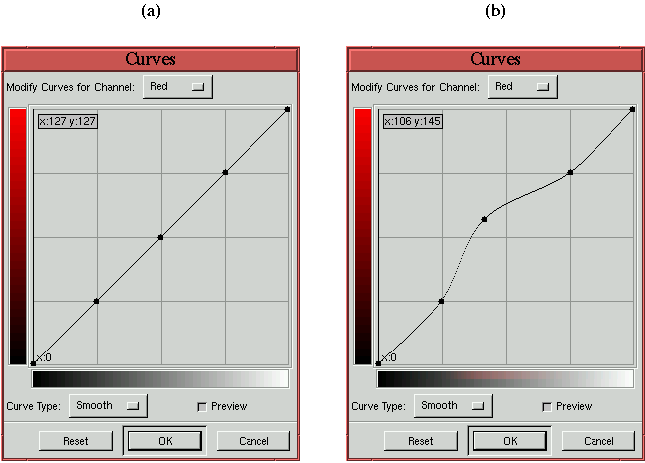
illustrates the idea. In Figure 6.18(a), the Red channel of the Curves tool is displayed, and three control points have been added to the curve at the quarter, half, and three-quarter positions. The regions of the curve around these points roughly control the shadow, midtone, and highlight regions of the Red channel. The perturbation technique works by moving the control points up or down and seeing whether the change improves the image. Figure 6.18(b) shows a perturbation of the midtone control point. Note that, in moving the midtone control point, the only parts of the curve that move are those between the shadow and highlight control points. The rest of the curve is constrained by the two other control points. This is very useful because it allows the Curves tool to act on a select part of the image's tonal range. The perturbation technique is not scientific and relies on the perceptual abilities of the user to see changes that improve or deteriorate an image. Nevertheless, cycling among the nine control points, making only gradual changes to each, can often produce marvelous results. The following example illustrates this approach.
Figure
6.19
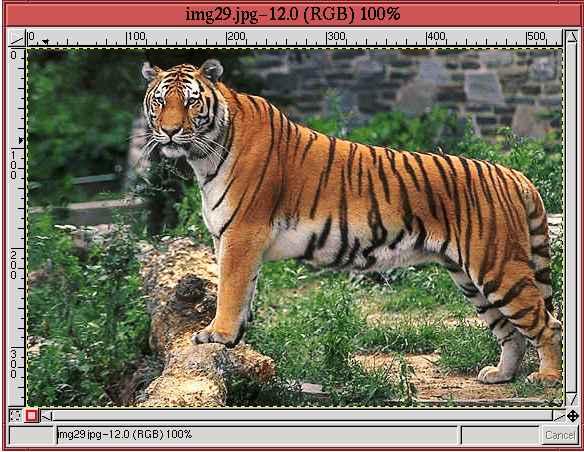
shows an image of a tiger that has a problem (the image, not the tiger). It has a subtle, overall green color cast. The color cast is so subtle, at first, I didn't even recognize it.
The perturbation technique is an approach to color correction that
requires experimentation. Thus, the steps are difficult to present in
book format. The best that I can do is to show you the results. For
this, Figure
6.20
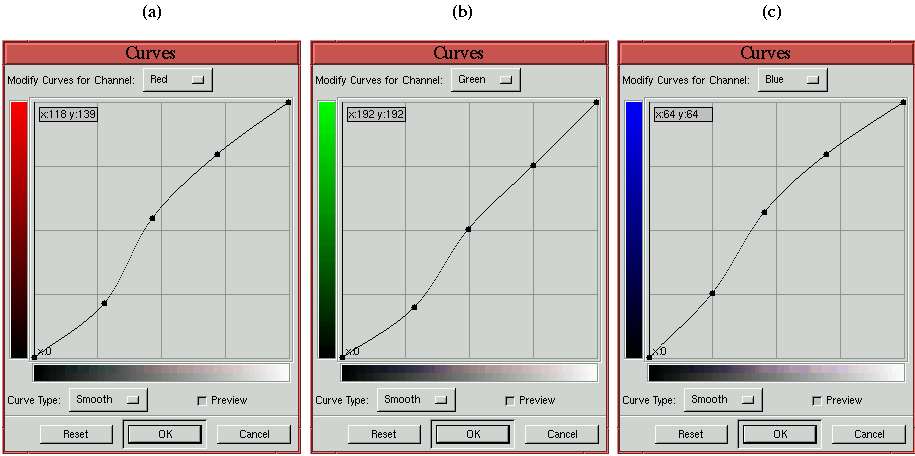
shows the final curves for the Red, Green, and Blue channels (shown in parts (a), (b), and (c), respectively). The resulting effect on the image is shown in Figure 6.21. Comparing Figure 6.21 with Figure 6.19 makes the green color cast in the original image readily apparent. Furthermore, you can see that the application of the perturbation technique has simultaneously improved the contrast of the image's subject. The tiger looks significantly enhanced. There is an important caveat to the perturbation technique. Because this method relies on the visual feedback you get from your monitor, the technique is highly dependent on the monitor's individual characteristics. What looks great on your monitor might not look as great on another. The method described earlier in this chapter that measures pixel values and then makes adjustments accordingly does not depend on the monitor. The earlier method is the preferred approach whenever possible.
|
|
||||||||||||||||||||||
| Published under the terms of the Open Publication License | Design by Interspire |


