4.3.5 Blurring of Masks and Other Effects
Section
3.1.2 discussed an edge-softening technique
called antialiasing and an edge-blending technique
called feathering. Effects similar to antialiasing and feathering can
be had by applying blur filters to masks.
White pixels in a mask correspond to selected pixels in an image
layer, and black pixels in the mask correspond to unselected image
pixels. If there are no gray pixels between the black and white
zones, this gives the selection edges represented by the mask the
harsh edge already seen in the discussion on antialiasing. Blurring a
mask softens the sharp edges in the mask by creating a graded zone of
gray between the regions of black and white pixels. The width of the
gray zone is controlled by the blur radius. The gray zones correspond
to partially selected pixels in the image layer, and this is what
creates the antialiasing/feathering effect for masks.
Figure
4.30
Figure 4.30:
An Image and a Mask
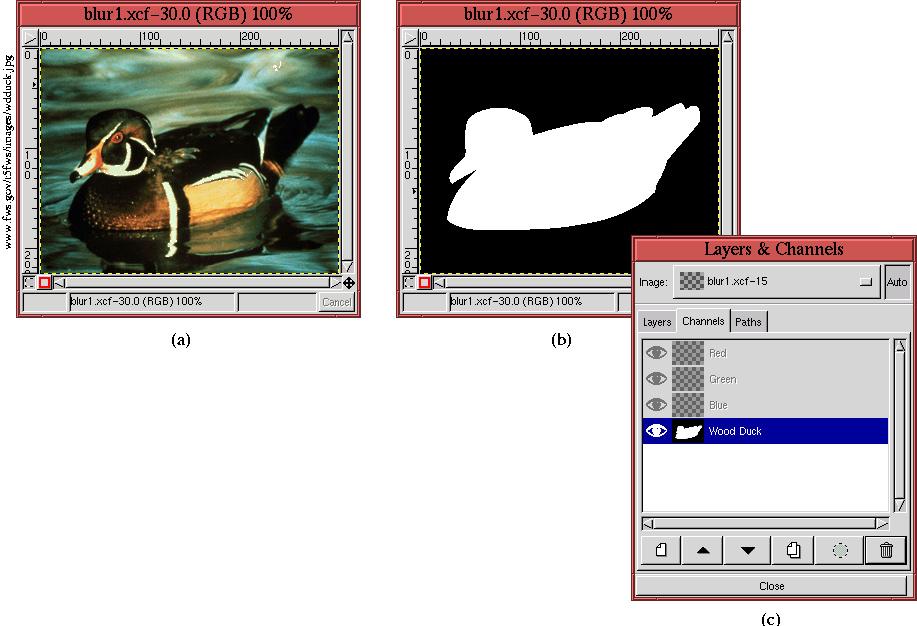 |
is used to illustrate the use of blur filters on masks.
Figure
4.30(a) shows an image of a wood duck, and
Figure
4.30(b) shows a channel mask representing a
selection of it. Figure
4.30(c) shows the associated
Channels dialog.
A closer examination of the wood duck mask is shown in
Figure
4.31(a).
Figure 4.31:
Aliased Mask Edge Softened Using Blur Filter
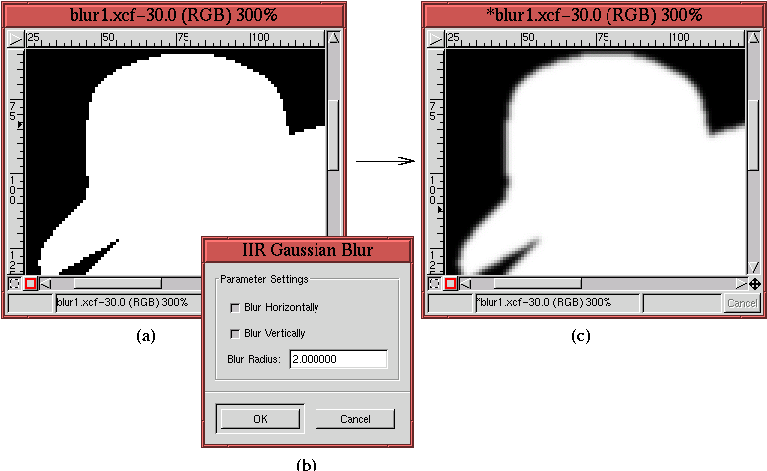 |
As can be seen, the mask has an unpleasant, hard, and aliased edge.
This can be softened by blurring the mask.
Figure
4.31(c) shows the result of applying the
Gaussian Blur (IIR) filter to the
mask. The filter dialog is displayed in
Figure
4.31(b), which shows the choice of blur radius.
In general, a small radius produces an antialiasing effect, and a
large blur radius creates a feathering effect. A blur radius of 1 was
used for this example.
Other interesting and artistic edge effects can be obtained by
processing masks with one or more of the GIMP's large collection of
filters, found in the Image:Filters menu.
Figures
4.32,
4.33, and
4.34 illustrate some examples.
Figures
4.32(a)
Figure 4.32:
Applying the Waves Filter to the Wood Duck Mask
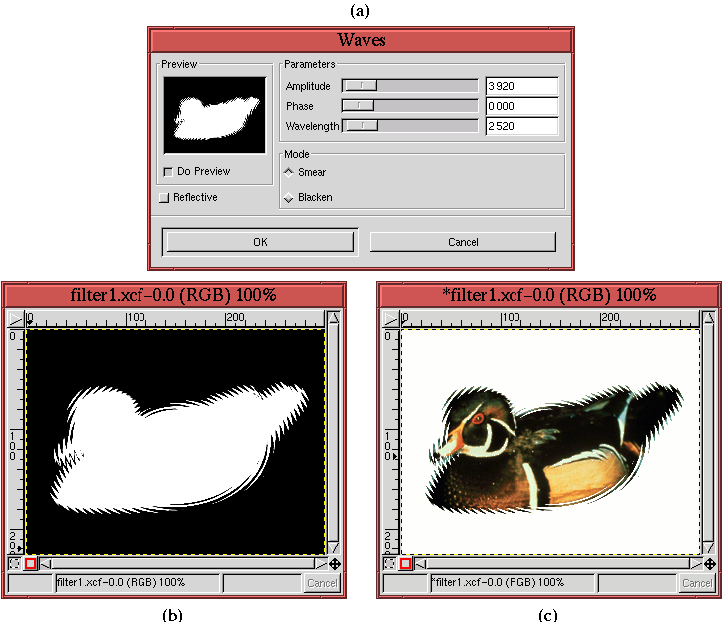 |
illustrates the
Waves
filter dialog, found in the
Image:Filters/Distorts menu. The
resulting effect on the wood duck mask is shown in
Figures
4.32(b), and the result of applying this mask
as a selection to cut away the image's background is shown in
Figures
4.32(c). Figure
4.33(a)
Figure 4.33:
Applying the Glass Tile Filter to the Wood Duck Mask
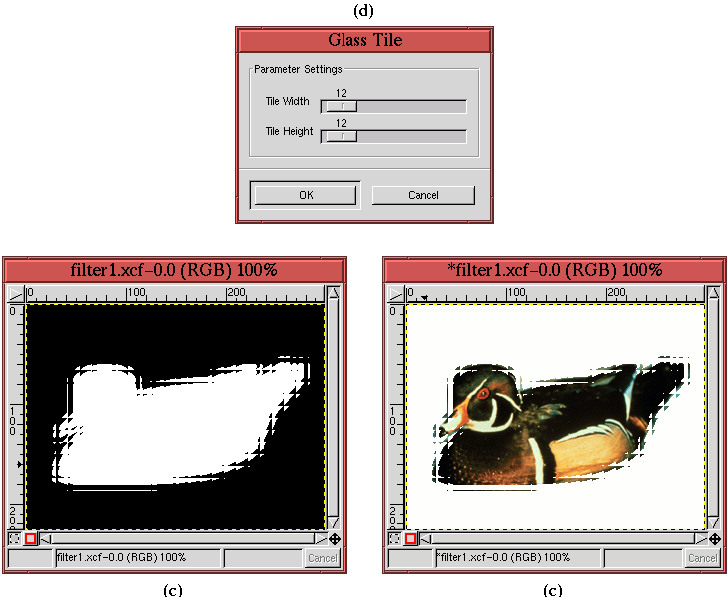 |
shows the
Glass Tile filter dialog, found in the
Image:Filters/Glass Effects menu. Figures
4.33(b)
and (c) show the effect of this filter on the mask and the image.
Figure
4.34(a)
Figure 4.34:
Applying the Spread Filter to the Wood Duck Mask
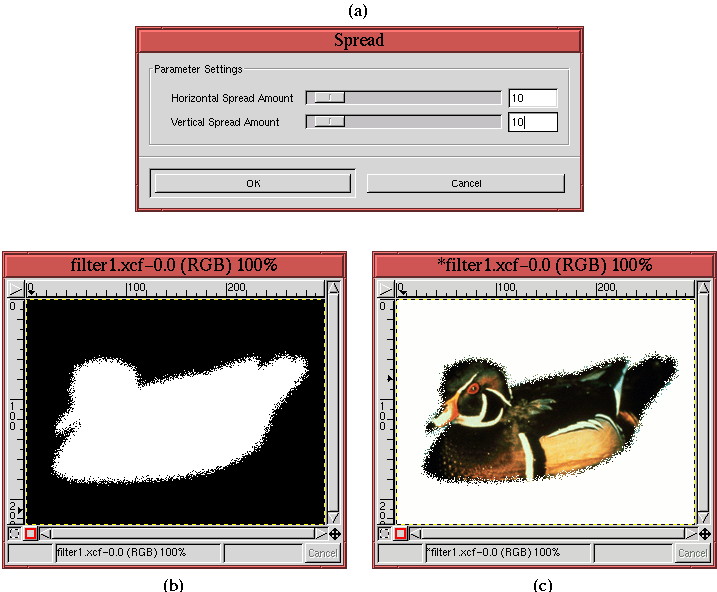 |
shows the
Spread
filter dialog, found in the
Image:Filters/Noise menu.
Figures
4.34(b) and (c) show the effect of this
filter on the mask and the image.
Many other interesting filter possibilities can be found. Have fun!
Experiment!
©2000 Gimp-Savvy.com
