4.1.6 Combining Channels
Section
3.2 describes how selections can
be combined; selections can be added, subtracted, and intersected.
These operations are useful because they allow the results from
different selection tools to be combined and because they also allow
the work to be performed incrementally. This can be particularly
important when selecting from a large image or when making a
complicated selection.
Channel masks can also be combined. This is done by converting the
masks to selections and then saving the combined result back to a
mask. Figure
4.7
Figure 4.7:
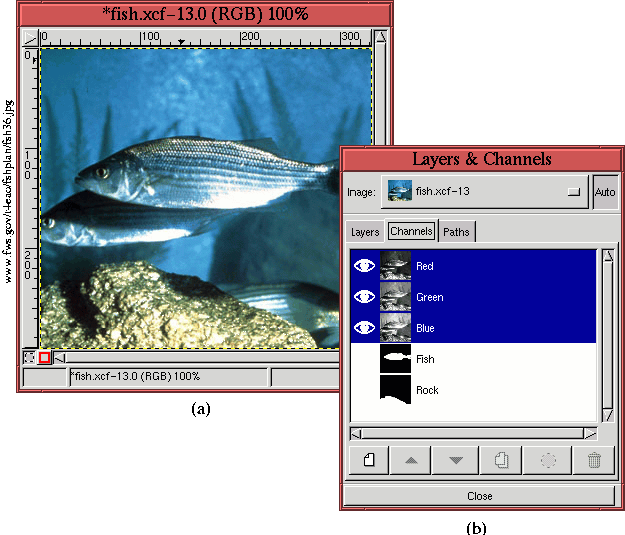
Two Channel Masks
 |
illustrates the procedure. Figure
4.7(a) shows an
underwater scene for which two selections have been previously made
and saved to channel masks. The channels strips for the two masks,
labeled Fish and Rock, can be seen in the Channels dialog, shown in
Figure
4.7(b).
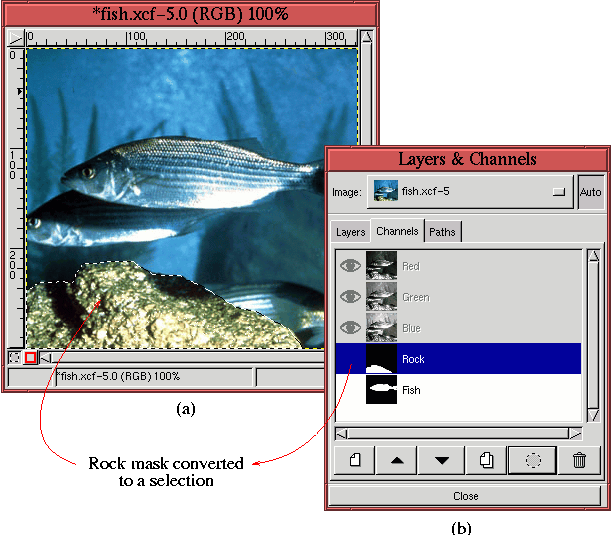
After making the channel labeled Rock the active channel, it is
converted to a selection by clicking on the Channel to Selection
button (represented by the dashed circle icon) in the button bar. The
active channel can be seen in Figure
4.8(b).
Figure 4.8:
Converting the First Mask to a Selection
 |
Figure
4.8(a) shows the resulting selection in
the image window. Note that it was not necessary nor useful to toggle
on the visibility of the channel mask to do this.
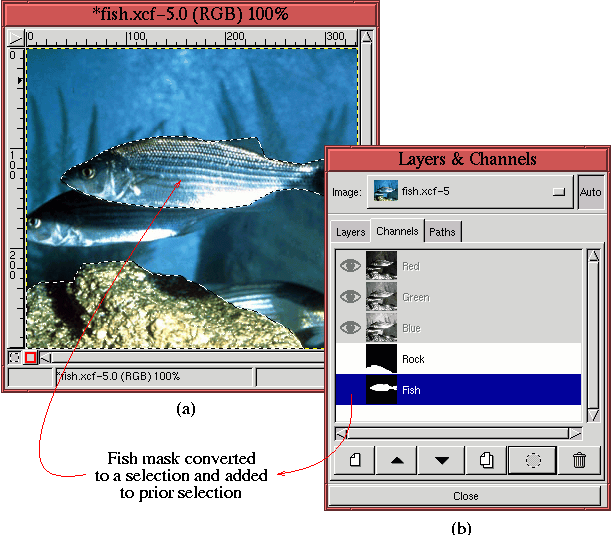
A similar operation is performed with the channel mask labeled Fish.
The mask is made active and then converted to a selection. Normally
the conversion of a mask to a selection replaces any selection already
active in the image window. However, the selection represented by the
mask can also be added to the active selection. This is accomplished
by choosing the Add to Selection function from the Channels menu, shown in
Figure
4.6(b). The Add to Selection
function can also be invoked by Shift-clicking the Channel to
Selection button in the button bar. The result of adding the
selection is shown in Figure
4.9(a),
Figure 4.9:
Converting the Second Mask to a Selection and Adding it to the First
 |
which shows the combined selection in the image window.
Two other combining modes are also available in the Channels menu.
These are the Subtract From Selection and the Intersect
With Selection functions. These can both be used from the Channel to Selection button in the button bar. Control-clicking the
button produces a subtraction and Control-Shift-clicking produces an
intersection.
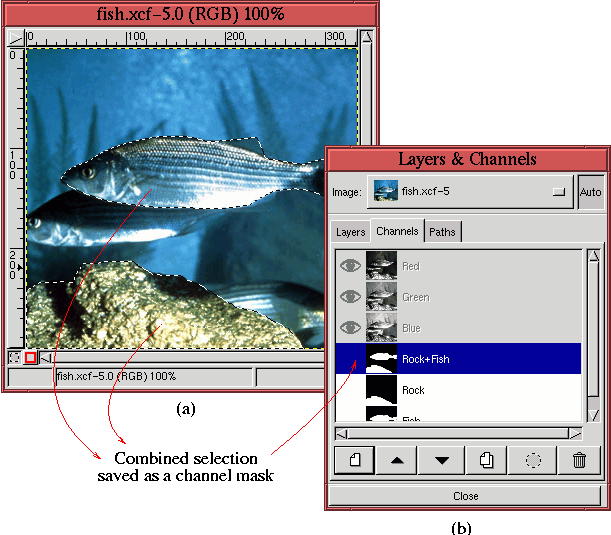
The final step to obtain a channel mask of the combined selection is
performed by using Save to Channel from the Image:Select
menu. The procedure is illustrated in Figure
4.10.
Figure 4.10:
Creating the Combined Channel Mask
 |
The resulting channel mask, which has been labeled Rock+Fish, is shown
in Figure
4.10(b).
