4.1.4 Setting a Channel Mask's Color, Transparency, and Title
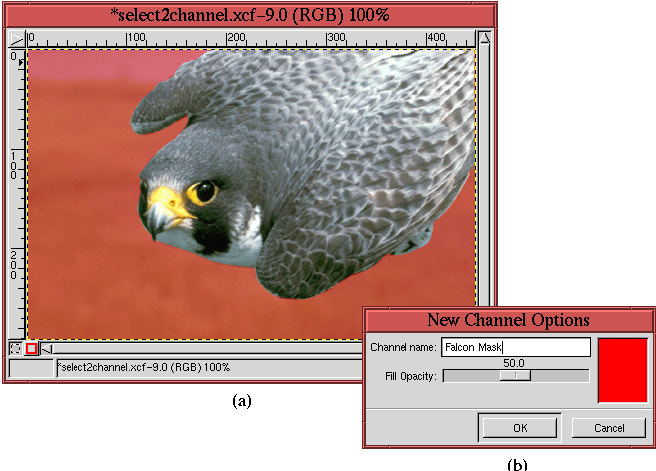
Double-clicking in the channel mask title area brings up the Channel Options dialog, shown in
Figure
4.5(b).
Figure 4.5:
Changing a Channel Mask's Color, Opacity, and Title
 |
This dialog allows three mask attributes to be set: the Channel name,
the Fill Opacity, and the mask color. Setting the name is
self-explanatory, but the other two attributes merit some discussion.
The Fill Opacity slider sets the degree to which the image layer
is visible through the filmy parts of the mask. The slider's units
are in percent so if the opacity is set to 100, the only parts of the
image that are visible are those that correspond to the white part of
the mask, and the parts of the image corresponding to the black parts
of the mask cannot be seen. Alternatively, if the opacity is set to
0, the image layer is completely visible, and the mask cannot be seen.
An intermediate opacity setting allows the masked-out regions of the
image to be seen through the black part of the mask. Adjusting the
Fill Opacity slider allows an optimum working level to be set for the
mask.
If some of the image pixels seen behind the semi-opacity of the mask
are dark, it will be difficult to see the details of these pixels.
This may impede your ability to make useful edits to the mask,
regardless of the Fill Opacity slider's setting. This is why the
color of the mask can be changed. Changing the mask's color is done
by clicking in the color patch of the Channel Options dialog.
This brings up the Color Selection dialog, from which any color
can be chosen. A good choice, of course, is one that contrasts well
with the image layer pixels. Closing the Color Selection dialog
changes the color in the Channel Options color rectangle.
Closing the Channel Options dialog makes this color appear at
the chosen opacity level in the image window. This is shown in
Figure
4.5(a), where a 50%-transparent red
has been chosen for the mask color.
