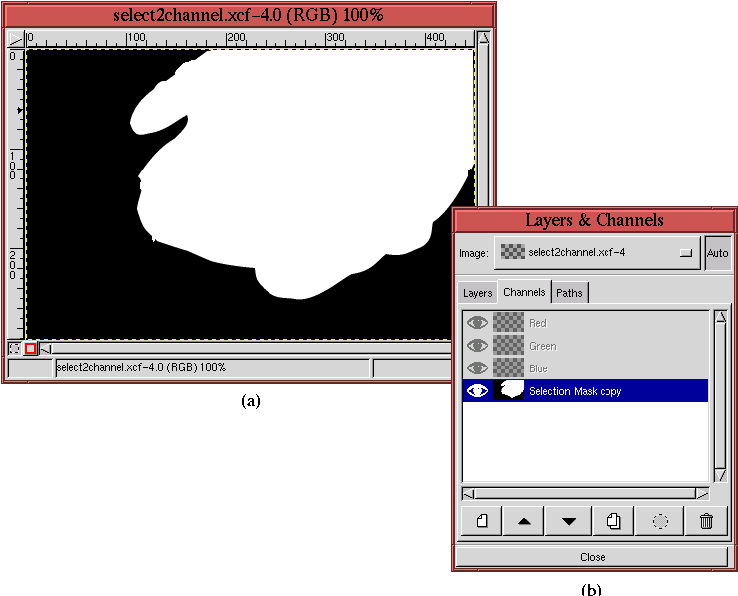
A channel mask's visibility can be toggled on or off by clicking on
its Eye icon. Looking again at
Figure
4.2(b), the Eye icon is not visible.
Toggling it on, as shown in Figure
4.3(b), and
toggling off the image layer's visibility produces the result shown in
Figure
4.3(a).
Figure 4.3:
Viewing a Raw Channel Mask in the Image Window
 |
This figure shows that the channel mask is now visible in the image
window.
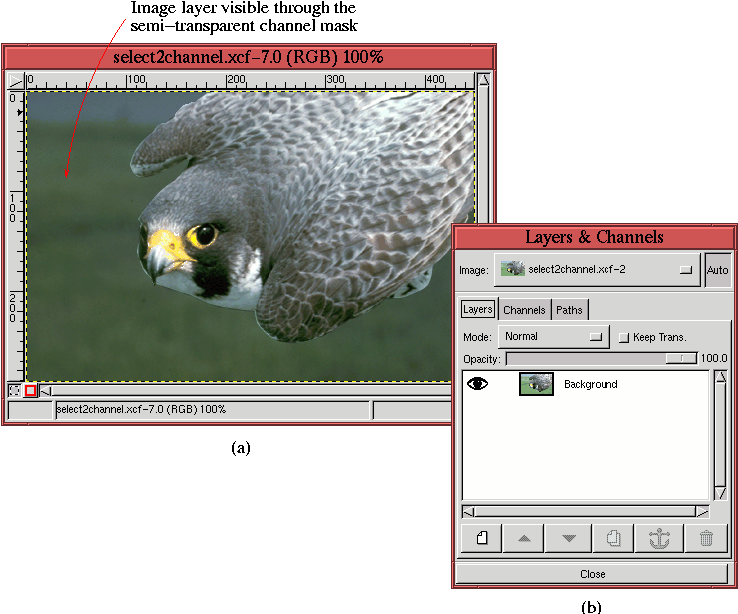
If the Eye icon of the image layer is toggled back on, as shown in
Figure
4.4(b), the resulting view in the
image window is Figure
4.4(a).
Figure 4.4:
Viewing an Image Layer Through the Channel Mask
 |
The image layer can now be seen through the channel mask. The parts
of the image corresponding to the white region of the mask appear
clearly, but the parts in the black region appear covered by a dark,
semi-transparent film. This demonstrates why these channels are
called masks; they allow the selected parts of the image to be clearly
seen while ``masking out'' the unselected parts.
Being able to see the image through the filmy parts of the channel
mask, as illustrated in Figure
4.4(a), makes
it possible to edit the mask according to the features of the image
behind it. In this way, the channel mask is like a piece of digital
tracing paper placed over the image.
