3.1.1.1 The Rectangle Select and Ellipse Select Tools
The Rectangle Select and Ellipse Select tools are used for
selecting rectangular and elliptical regions in an image. A selection
is initiated by clicking and dragging in the image window, and the
selection is completed by releasing the mouse button. The selection
process is interactively facilitated by an outline of the selection
that can be seen while the mouse is being dragged.
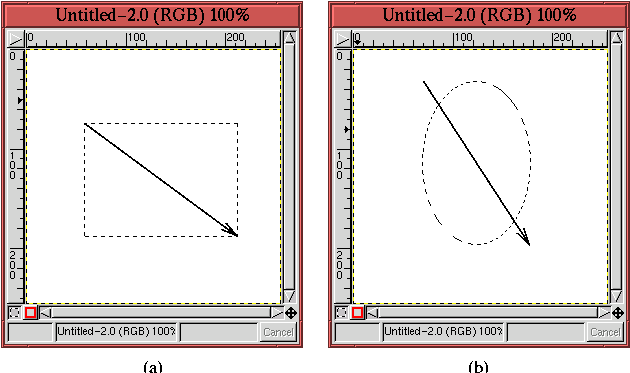
Figure
3.2 shows examples of both the
Rectangle Select and Ellipse Select tools.
Figure 3.2:
The Rectangle Select and Ellipse Select Tools
 |
When completed, selections are displayed as moving dashed lines,
traditionally referred to as the
Marching Ants.
In the figure,
the arrows are just for illustrating where the selections begin and
end. They don't actually appear when you use these tools. The
arrows' tails show where the selections were initiated, and the heads
show where they were terminated. Note that for the
Ellipse
Select tool the selection is inscribed in a rectangle defined by the
arrow's head and tail.
A perfectly square selection can be made with
the Rectangle Select tool, and a perfectly
circular selection can be made with the
Ellipse Select tool. The trick is to use the Shift key, but
read on carefully. Two other selection tricks are also performed with
the Shift key (see Section
3.2 for the
other). To avoid confusion, it is important to pay close attention to
how this works.
To obtain a perfectly square or circular selection, begin the
selection by clicking and dragging in the image window. While the
mouse button is down, press the Shift key. In the image window,
the resulting selection shape becomes a perfectly square or circular,
depending on the tool you are using. The Shift key must remain
pressed until the selection is finished and the mouse button has been
released. Only then may the Shift key be released. If the Shift key
is released before the left mouse button, the selection will revert to
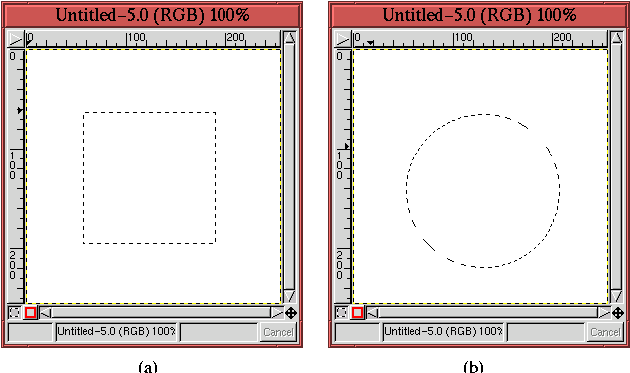
a normal rectangle or ellipse selection. The results of using the
Shift key with the Rectangle Select and Ellipse Select
tools are illustrated in Figure
3.3.
Figure 3.3:
Making Perfectly Square and Circular Selections with the
Rectangle Select and Ellipse Select Tools
 |
Instead of initiating a rectangular or elliptical selection at one
corner and terminating at the opposite one, it is also possible to
initiate from the selection's center, terminating at a corner. The
trick for this is similar to the technique just described for creating
a perfectly square or circular selection. It is done by pressing the
Control key after initiating the selection with the left mouse button.
The Control key must remain pressed until after the mouse button is
released. To combine perfectly square or circular selections in
conjunction with center initiated ones, the Shift and Control keys
must both be pressed after the left mouse button is clicked and remain
so until after the mouse button is released.


