|
 |
|
| |
Specifying text flow

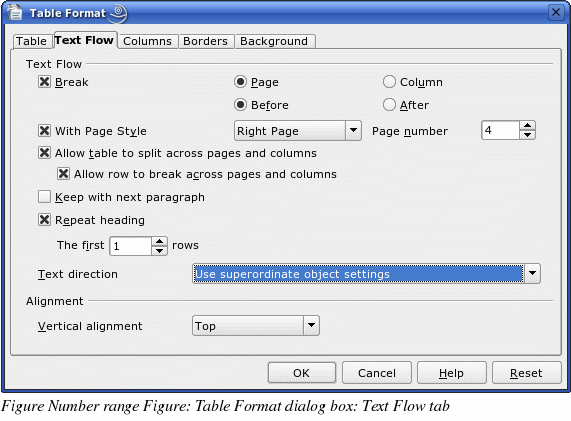
On the Text Flow tab of the Table Format dialog box (Figure 251), you can:
-
Insert a page or column break either before or after the table. Use the Text Flow: Break checkbox, combined with the Page or Column and the Before or After buttons.
If you insert a page break before the table (that is, start the table on a new page), you can also change the page style that will go with it by checking the With Page Style box and selecting a new page style. As with any page break, you can also reset the page numbers using the Page number box.
-
Keep a table on one page by deselecting the Allow table to split across pages and columns checkbox. If this item is deselected, the next item is not active.
-
Keep each row on one page by deselecting the Allow row to break across pages and columns checkbox.
-
Use the Repeat heading checkbox and the numbers box to select the number of table heading rows that will be repeated on each page. A complicated table may need two or three heading rows to be easily read and understood.
-
Use the Text direction list to select the direction for the text in the cells. The most common setting is “left to right†for Western languages. Note: The phrase “Use superordinate object settings†means “use the formatting settings from the paragraph before the table.â€
-
Select the vertical alignment of the text in the table or the selected cells; the choices are to align with the top of the cell, the center of the cell, or the bottom of the cell. This alignment is in addition to the Left-Right alignment options available under Table > Table Properties > Table or by right-clicking and choosing Tables > Table.
|
Note
|
A Table Heading row will not span two pages, but any other row will. A one-row table, set up with the default of including a heading, will not break across pages. The cure is to make sure the table is defined without a heading row.
|
|
|
|
