Specifying table borders
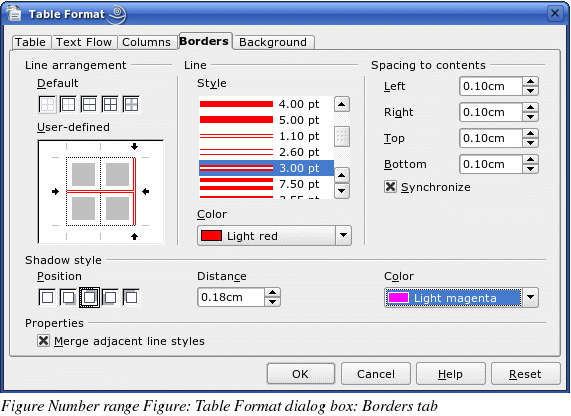
On the Table Format dialog box, select the Borders tab (Figure 253).
Here you can set borders for a whole table or groups of cells within a table. In addition, a shadow can be set for the whole table.

Borders have three components: where they go, what they look like, and how big a space is left around them.
-
Line arrangement specifies where the borders go. If a group of cells is selected, the border will be applied only to those cells. You can specify no border or any combination of border for the outside edges and the cell divisions, either by selecting a default arrangement or by clicking on the lines in the User-defined area to get exactly what you want.
-
Line specifies what the border looks like: the style and color. There are a number of different styles and colors to choose from.
-
Spacing to contents specifies how much space to leave between the border and the cell contents. Spaces can be specified to the left, right, above, and below. Check Synchronize to have the same spacing all the way round.
Shadows always apply to the whole table. A shadow has three components: where it is, how thick it is, and what color it is. Set each of these under Shadow style on the dialog box.
If Merge adjacent line styles is checked, two cells sharing a common border will have their borders merged, rather than being side by side.
|
TIP
|
To reset everything if you are having problems with borders, right-click in the table and select Tables > Borders or select Tables > Table Properties > Borders and then select Set no borders under Line arrangement: Default (the box on the left).
|
