Modifying paragraph styles
The power of styles lies in the ability to modify them to suit your needs. For the next example, we will need three lines of text with three OOo-supplied paragraph styles: Heading 1, Heading 2, and Heading 3. These paragraph styles could be used in formating headings in the framework for a document that will be “fleshed out†afterwards. Your document should resemble Figure 155.
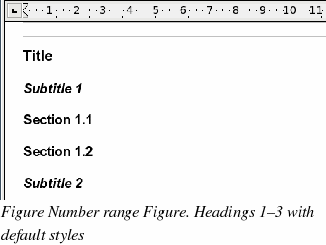
Open a new text document for this exercise and type Title on the first line, press the Paragraph Styles icon on the Styles and Formatting window, and double-click Heading 1 in the drop-down list. Repeat this procedure for the other entries, using the proper paragraph style for each. The Heading 1 style should be applied to the “paragraph†containing the word “Titleâ€, Heading 2 to “Subtitle 1â€, and so on.
|
Note
|
Heading 1 uses a bold font typeface, Heading 2 uses a 14pt bold italic typeface, and Heading 3 uses a 14pt bold typeface.
|
Suppose you decide to make some changes to these styles:
Center Heading 1
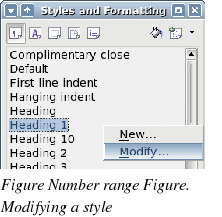
On the Styles and Formatting window, select the Paragraph Styles icon (if it isn’t already chosen), right-click on Heading 1, and choose Modify (as shown in Figure 156).
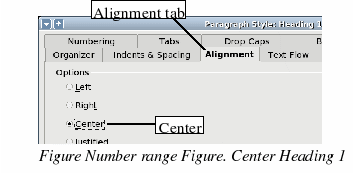
When the Paragraph Style window opens, choose the Alignment tab, select Center (as shown in Figure 157), and click OK.
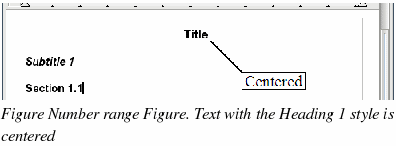
Now, everything marked as Heading 1 will be centered (as shown in Figure 158). If you make another Heading 1 entry, it will be centered as well.
Indent Heading 3
On the Styles and Formatting window, right-click on the Heading 3 paragraph style and choose Modify (as before). When the Paragraph Style window opens, follow the steps below:
-
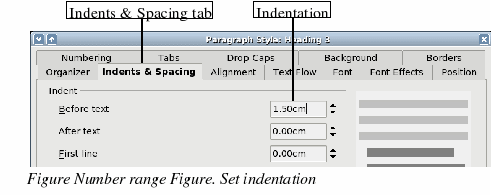
Click the Indents & Spacing tab.
-
Under the Indent section, set the indentation before the text to 1.50cm (0.6 in), as shown in Figure 159.
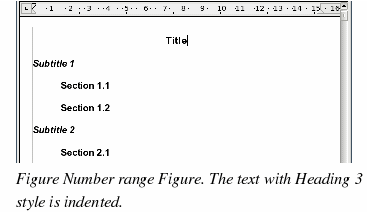
The result should resemble Figure 160.
