Working with 3D shapes
3D graphic objects
can be created in different ways in Impress:
From
the 3D-Objects toolbar. The 3D-Objects tool is not included in the
default Drawing toolbar. To include it, click on the small triangle
at the end of the toolbar, select Visible
Buttons, and select 3D-Objects
from the list. On the Drawing toolbar, click on the triangle by the
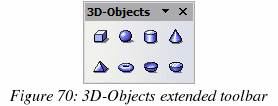
3D-Objects icon to display the extended 3D Objects toolbar (Figure 70).

From
Convert menu as Rotation. Select an object, right-click on it, then
select Convert
and select To 3D Rotation
Object.
From
the Extrusion on/off
icon on the drawing toolbar. Select the shape to which apply a 3D
effect, then click the
 button on the Drawing toolbar (see Figure 71).
|
Caution

|
You
can not apply extrusion to rectangular and oval shapes created
using the rectangle and the oval tools respectively. To create a
rectangle or oval with 3D effects, select the desired shape from
the basic shapes menu. Alternatively, right-click on the object
then select Convert
> To 3D. Note
though that in this case the Extrusion
on/off menu will
not be enabled.
|
Although
Impress offers advanced functions to manipulate 3D objects, this
book describes only the 3D settings applicable to an object with
Extrusion enabled. For additional information on how to use advanced
3D effects such as geometry and shading, refer to the Draw
Guide.
Click
on
 to activate the extrusion. The shape changes and a default thickness
is added to it. At the same time the 3D-Settings toolbar (Figure 71)
should become visible. If the toolbar does not appear, select View
> Toolbars > 3D-Settings.

Use
the tools to change the appearance of the 3D object.
 Extrusion On/Off:
adds thickness to an object and activates the 3D properties.
 Tilt Down: tilts
the object downwards around an horizontal axis.
 Tilt Up: tilts the
object up around an horizontal axis.
 Tilt Left: tilts
the object left around a vertical axis.
 Tilt Right: tilts
the object right around a vertical axis.
 Depth: determines
the thickness of the shape. An extended toolbar opens where some
default values are given. If none of them is satisfactory, select
Custom and then enter the desired thickness.
 Direction: pick the
direction of the perspective as well as the type among parallel and
perspective from the extended toolbar that opens when clicking the
button.
 Lighting: specify
the direction of the light as well as its intensity from the
extended toolbar that opens when clicking this button.
 Surface: choose
between Wire frame (useful when manipulating the object), Matt,
Plastic or Metal.
 3D Color: select
the color of the object thickness.
Most
of the Fontwork shapes (see “Using Fontwork” on page 113) have
3D properties and can be manipulated with the 3D-Settings toolbar.
Note
that when rotating a 3D object, in addition to the corner red
handles, the four handles on the sides of the frame become
available.
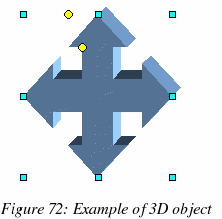
Figure 72 is
an example of customized 3D object.

