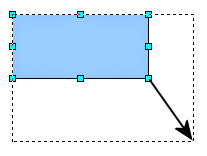
Creating lines and shapes

Figure
68: Creating a shape
To create shapes
and lines:
Select
the desired line or shape tool.
Click
and drag to create the object on the slide. See Figure 68.
When
drawing a polygon, keep the Shift
key pressed to restrict the angle between the segments to multiples
of 45 degrees. To finish drawing a polygon, double-click on the last
part of the segment. If a closed polygon was selected, OOo will
color the inside area.
When
drawing certain shapes, one or more yellow dots are displayed along
with the blue resizing handles. These dots perform a different
function according to the shape they are applied to. With the basic
shapes the yellow dot (or dots) are used for the following purposes:
Rounded
rectangle and Rounded square shapes: use the yellow dot to change
the size of the curve replacing the corners.
Circle
Pie: use the two yellow dots to change the size of the filled
sector.
Isosceles
triangle: move the yellow dot on one vertex to modify the triangle
type.
Trapezoid,
Parallelogram, or Octagon: move the yellow dot to change the angle
between the sides.
Cross:
use the yellow dot to change the thickness of the four sides.
Ring:
use the yellow dot to change the internal diameter.
Block
arc: use the yellow dot to change both the internal diameter and
the size of the filled area.
Cylinder
and Cube: use the yellow dot to change the perspective.
Folded
corner: use the yellow dot to change the size of the corner.
Frame:
use the yellow dot to change the internal rectangle diagonal.
