The first thing we need to do is to tell Windows to keep user profiles separate, and to collect usernames and passwords to authenticate anyone trying to access a Samba share. We do so via the Password settings in the Control Panel. If you are not familiar with the Windows Control Panel, you can access it by choosing the Settings menu item from the pop-up menu of the Start button in the lower-left corner of the screen. Alternatively, you'll find it as a folder under the icon in the upper-left corner that represents your computer and is typically labeled My Computer.
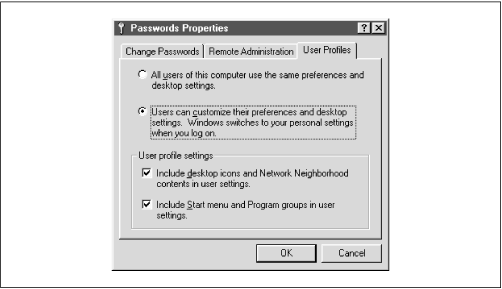
After selecting the Passwords icon in the Control Panel, click on the User Profiles tab on the far right. You should see the dialog box shown in
Figure 3.1. Then click the lower of the two radio buttons that starts "Users can customize their preferences...." This causes Windows to store a separate profile for each user, and saves the username and password you provide, which it will use later when it connects to an SMB/CIFS server. Finally, check
both the options under the User Profile Settings border, as shown in the figure.

The next step is to select the Change Passwords tab on the left side of the dialog box. In order for Samba to allow you access to its shares, the username and password you give to Windows must match the account and password on the Samba server. If you don't have this tab in your dialog box, don't worry; it's probably because you haven't given yourself a Windows username and password yet. Simply click the OK button at the bottom and respond Yes when Windows asks to reboot. Then, skip down to the section entitled
Section 3.1.1.2, Logging in for the first time."
