8.7 Rendering Project III: Chiseled Text
This project describes a nice rendering effect that creates the
illusion of chiseling into stone. The example is illustrated using
text, however, it can be applied to any shape. The chiseling effect
is created using gradients, bumpmapping, and shadows--basically all
the rendering tools discussed in this chapter.
The finished project will consist of three layers. The background
layer will contains an image pattern, in this case pink marble. The
top layer will contain text filled with the same image pattern and
bumpmapped to make it look chiseled. The middle layer will be a drop
shadow for the text.
To begin, a new image of dimensions
 pixels is created.
It is then filled, using the Bucket Fill tool, with the pink
marble pattern from the Pattern Selection dialog. This layer is
labeled Marble Background in the Layers dialog and is shown in
Figure
8.34(a).
Figure 8.34:
Creating the Background, Text, and Drop Shadow for the Chiseled Effect
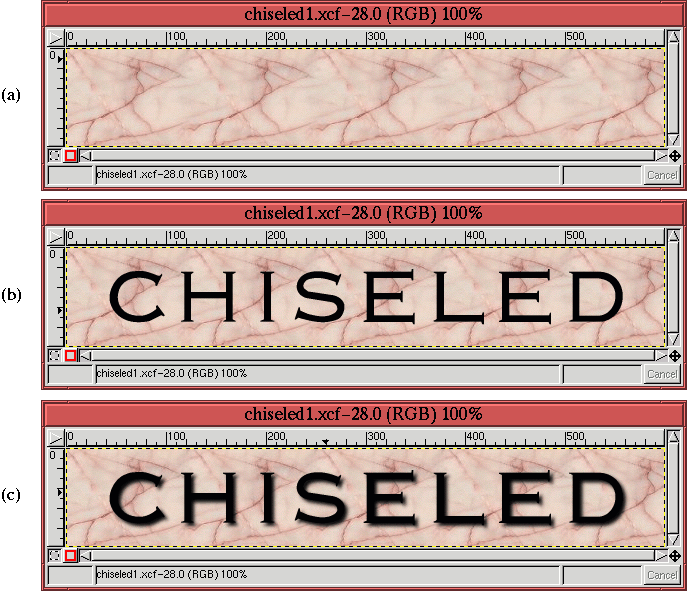 |
The next step is to create some black text on a transparent layer
above the Marble Background layer.
The transparent layer is made by clicking on the New Layer
button in the Layers dialog, and the text is created by, first,
selecting black as the Active Foreground Color, and, then,
invoking the Text tool. The Text tool is used to place
the word CHISELED, in the Engraver font, at a size of 72 pixels, into
a floating selection. Cutting and repasting the float perfectly
centers the text in the image window. It is then anchored to the
transparent layer beneath it by clicking on the Anchor button in
the Layers dialog. This layer is labeled Text in the Layers dialog,
and the resulting image is illustrated in
Figure
8.34(b).
The drop shadow is created
by duplicating the Text layer, blurring it with Gaussian Blur
(IIR) using a radius of 5 pixels,
and then applying Offset with the values
of 3 pixels for both the X and Y directions. This layer is then
positioned between the Text and Marble Background layers using the
positioning buttons in the Layers dialog button bar. This layer is
labeled Text Shadow in the Layers dialog. The result is shown in
Figure
8.34(c).
The next step is to fill the text in the Text layer with a shapeburst
gradient. For this, the layer
is made active by clicking on its thumbnail in the Layers dialog, and
the text is selected using the Alpha to Selection function from the Layers menu. Setting the Active Foreground Color and the Active Background Color to
white and black, respectively, the Gradient tool is used to fill
the text with a Shapeburst (angular) gradient. The selection is
then canceled by typing C-S-a in the image window, and the
result is shown in Figure
8.35(a).
Figure 8.35:
Using the Shapeburst Gradient on the Text Layer
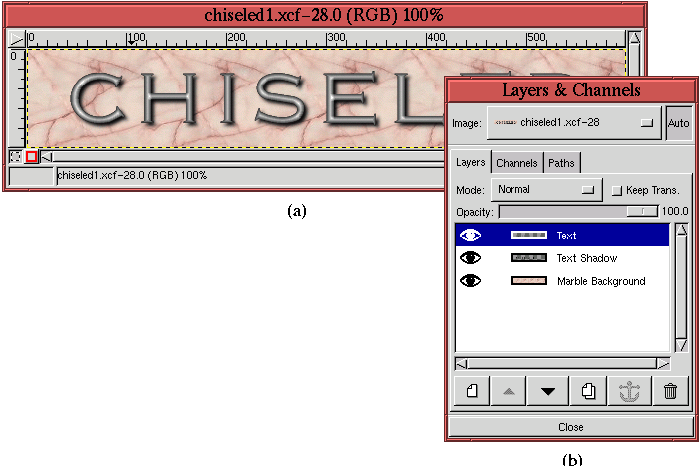 |
The associated Layers dialog is shown in
Figure
8.35(b).
The project is now almost complete. What remains is the application
of the shapeburst filled text as an embossing map to the marble
background layer. This is done, of course, using Bump
map. The Marble
Background layer is made active by clicking on its thumbnail in the
Layers dialog and the Bump map filter is invoked. The filter
dialog illustrated in Figure
8.36(b)
Figure 8.36:
Creating the Chiseled Effect Using Bump map
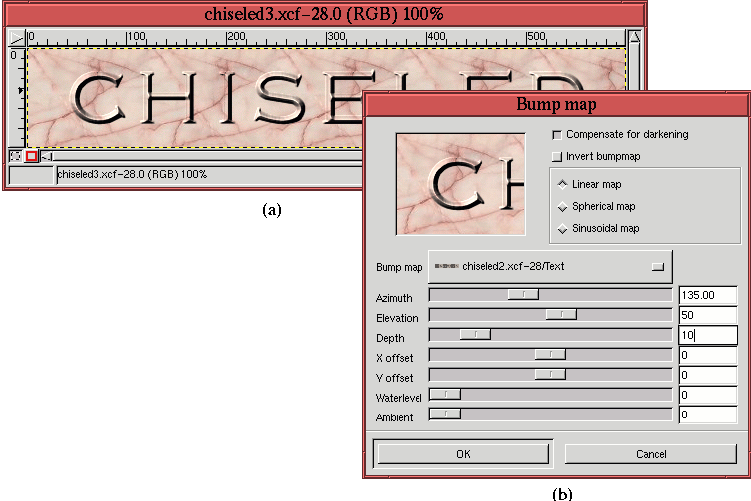 |
shows the parameters used and Figure
8.36(a)
shows the resulting effect on the Marble Background layer. Note that
the visibility of the Text and Text Shadow layers has been toggled off
so the chiseled text can be seen in the figure.
All that remains to complete this project is to move the chiseled text
to the top layer of the stack. This is done in the following steps:
- 1.
- Make the Text layer active by clicking on its thumbnail in the Layers
dialog.
- 2.
- Select the text using the Alpha to Selection function from the Layers menu.
- 3.
- Make the Marble Background layer active by clicking on its thumbnail
in the Layers dialog, and copy the chiseled text into a buffer by
typing C-c in the image window. Due to the selection obtained
in step (2) only the chiseled text is copied to the buffer.
- 4.
- Cancel the selection by typing C-S-a in the image window.
- 5.
- Make the Text layer active by clicking on its thumbnail in the Layers
dialog, and paste the buffer contents to a floating selection by
typing C-v in the image window.
- 6.
- Anchor the float to the Text layer by clicking on the Anchor
button in the Layers dialog.
The result is shown in Figure
8.37(a),
Figure 8.37:
Copying and Pasting the Chiseled Text to the Top Layer
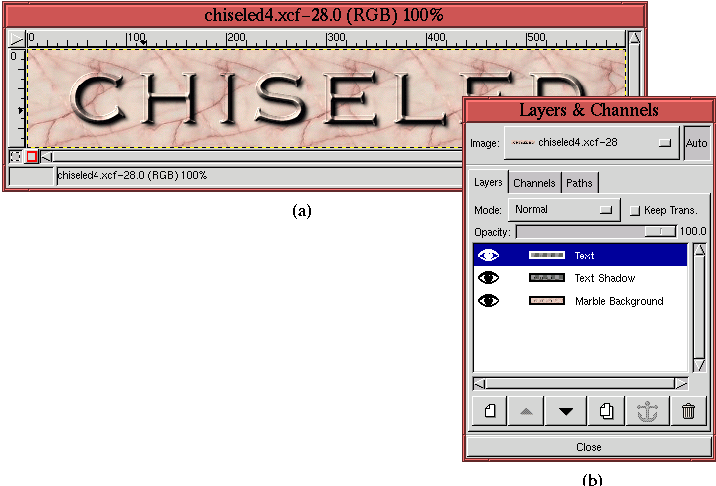 |
and the Layers dialog is shown in
Figure
8.37(b).
As a final flourish, the chiseled text is lightened somewhat to make
it more prominent against the marble background. This is done by
making the Text layer active and, as shown in
Figure
8.38(b), by adjusting the middle control
of the input slider of the Levels tool dialog.
Figure
8.38(b)
Figure 8.38:
Lightening the Text with the Levels Tool to Produce the
Final Chiseled Effect
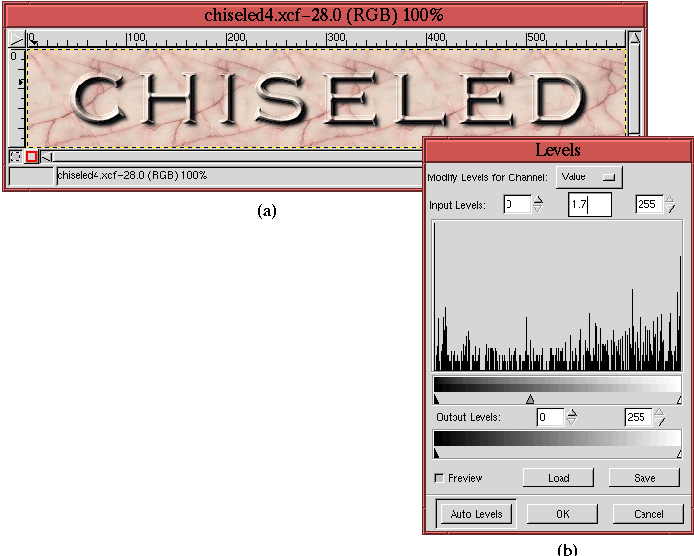 |
shows the resulting settings in the
Levels dialog, and
Figure
8.38(a) shows the final effect.
©2000 Gimp-Savvy.com
