4.5.2 The Quick Mask
The previous section showed you how a channel mask could be used
to refine a selection. This is so useful that the GIMP has a special
pair of function buttons on the image window allowing a selection to
be quickly converted to a channel mask and vice versa. These are
called the Quick Mask buttons.
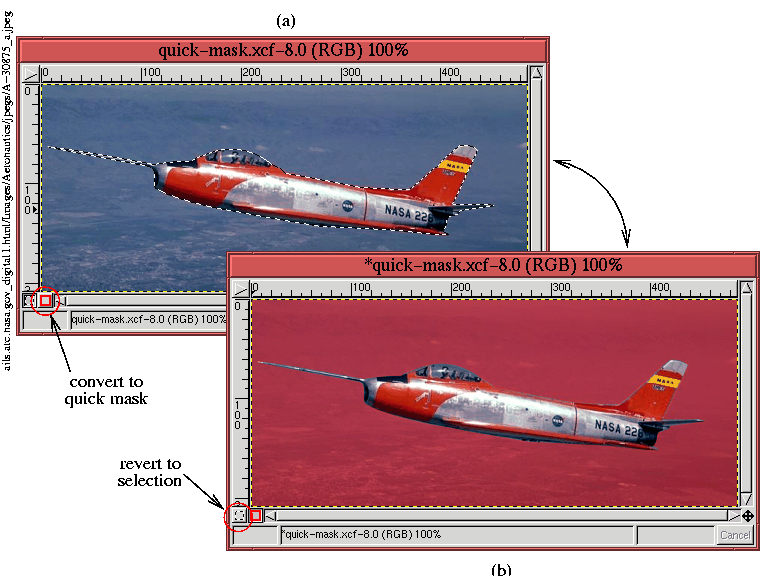
Figure
4.41(a)
Figure 4.41:
Using the Quick Mask
 |
illustrates an image with a selection. It also shows a button circled
at the lower-left side of the image window containing a red square
icon. This is the
Quick Mask button. Clicking on it
converts the selection to a mask, as shown in
Figure
4.41(b). The button shown circled in
Figure
4.41(b) contains an icon showing a square
drawn in a dashed line and resembling the Marching Ants. Clicking on
this button reverts the quick mask to a selection. Thus, the
Quick Mask buttons can be used to quickly convert a selection to a
mask that can then be edited, as described in
Section
4.5.1, before being converted back to a selection.
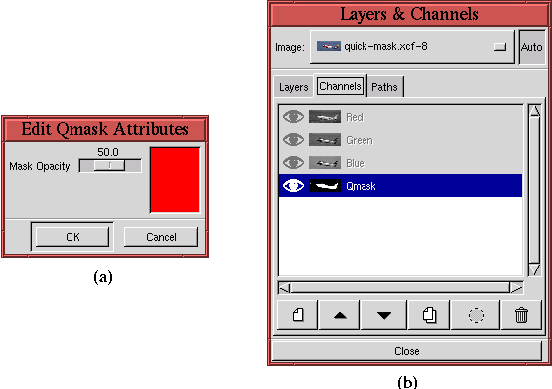
Figure
4.42
Figure 4.42:
Quick Mask Options
 |
shows two features of the
Quick Mask buttons. Double-clicking
either of the buttons brings up the
Edit Qmask
Attributes dialog. This dialog,
shown in Figure
4.42(a), permits the default
opacity and color of the mask to be modified. The second feature of
the quick mask is shown in Figure
4.42(b). When
the quick mask is created, it also appears in the Channels dialog with
the label Qmask in the Channel Title area. This channel exists only
as long as the quick mask and disappears as soon as the mask is
reverted to a selection.
