2.6.1.2 Aligning Layers with Guides
Sometimes a layer needs to be positioned more carefully than can be
easily judged by eye. Under these circumstances, it is often
convenient to use guides to facilitate their placement. Guides are
useful because they have a snapping property . A layer released sufficiently near a guide will jump to
the guide position. The snapping property of guides is controlled by
the Snap to Guides checkbox in the Image:View menu. The
checkbox must be toggled on for the snapping property to work.
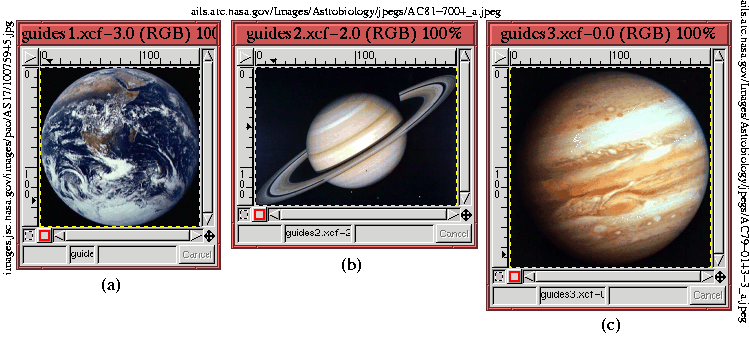
To illustrate how guides are useful for layer positioning, the three
planet images shown in Figures
2.13(a), (b), and (c)
Figure 2.13:
Images to be Aligned with Guides
 |
were each copied and pasted to new layers in a larger image window
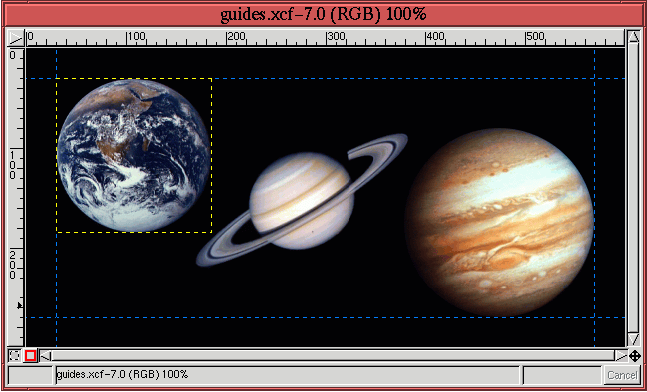
with a black background. This is shown in
Figure
2.14.
Figure 2.14:
Images Aligned with Guides
 |
The objective is to organize the planets on a diagonal, but with a
uniform black border between them and the window edge. This was done
by placing two horizontal and two vertical guides in the image window,
each positioned exactly three ruler tick marks from the edge. Where
do the guides come from? Well, they are hidden inside the rulers at
the left and top edges of the image window. Clicking on a ruler and
then dragging the mouse into the image window drags a guide along with
it. Releasing the mouse button positions the guide. Any number of
guides can be created in this way. Once the guides are positioned,
their visibility can be toggled on or off with the Toggle
Guides function, found in the Image:View menu, or by typing C-S-t in the image window.
The guides can be seen in Figure
2.14 as blue dashed
lines. The Jupiter and Earth layers were positioned with the Move tool so that their corners were aligned at the cross-hairs of
the guides. It can be seen that the active layer, designated by the
yellow dashed boundaries shown in Figure
2.14, are
perfectly aligned with the guides. That the layers snapped to the
guides simplified the positioning operation. When no longer needed,
the guides can be moved off the image by first activating the Move tool from the Toolbox and then using the mouse to drag the
guides back into the rulers.
