Setting up envelope details from a database
You can use a database as a source of name and address details for printing one or a series of envelopes, either alone or with accompanying letters. Mozilla address books, dBase databases, spreadsheets, databases created by OOo Base, and others can be used as data sources.
After you have set up a data source (see Chapter 10, “Getting Started with Base†in the Getting Started guide), you need to register it with OOo so OOo can access it.
To register a data source, select File > New > Database, select Connect to an existing database, and select the type of data source to connect to. The exact source can then be chosen in the wizard.
For more details on how to set up a database or address book as a data source, see the chapter titled “Getting Started with Base†in the Getting Started guide.
To use the database when printing envelopes:
-
Click Insert > Envelope from the menu bar.
-
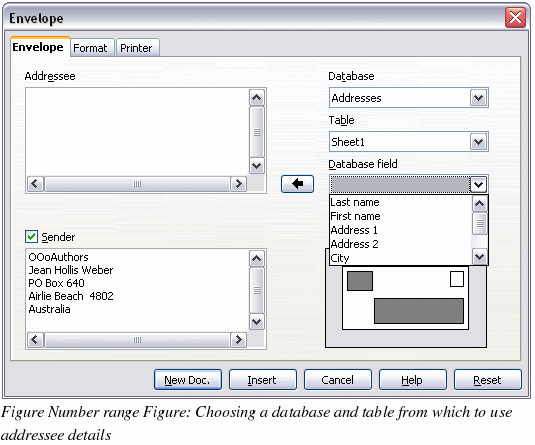
On the Envelope dialog box (Figure 132), select from the Database list the name of the data source. In the Table list, select the database table or sheet containing the address data that you want to insert. The Database field list will now show a list of the fields in the selected database.

-
Select the field containing the first piece of data (for example, first name) that you want to insert, then click the left arrow button to add the data to the Addressee box.
-
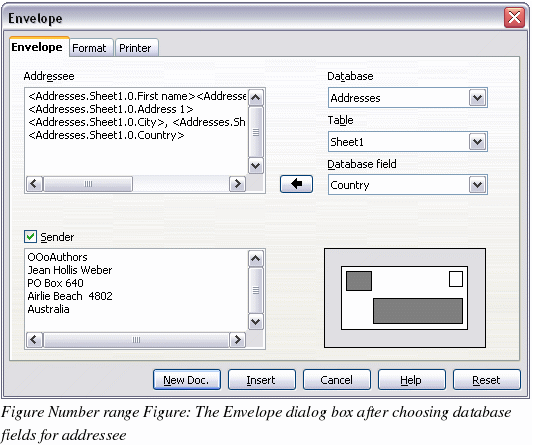
To put another field on the same line in the Addressee box, select that field and click the left arrow button again. Be sure to include punctuation or spaces between fields in the Addressee box as needed.
-
To put a field (for example, the address) on a new line, press Enter at the end of the previous line in the Addressee box. When you are finished selecting fields, the Envelope dialog box will look something like Figure 133.

-
Click Insert or New Doc. A formatted envelope is now visible in your document
-
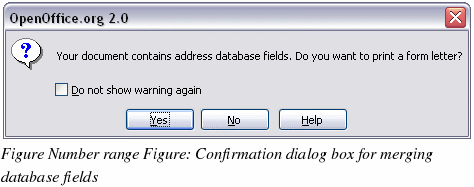
Click File > Print from the menu bar. The dialog box shown in Figure 134 appears. Click Yes.

-
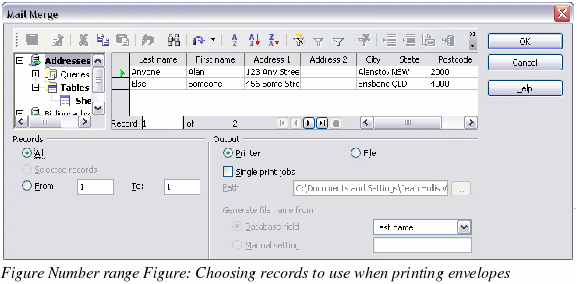
The Mail Merge dialog box (Figure 135) appears. Here you can choose to print envelopes addresses to one, several or all address records in the database. For more about using mail merge, see the chapter titled “Using Mail Merge†in this Writer Guide.
-
Make your selections and then click OK to begin printing.

