Logging In to Trusted Extensions
The following tasks step you through logging in to Trusted Extensions. You review
and specify security information before reaching the desktop.
Choose a Trusted Desktop
- On the login screen, choose a desktop from the Options --> Sessions menu.
For Trusted GNOME, choose Solaris Trusted Extensions (GNOME).
- Continue with Identify and Authenticate Yourself to the System.
Identify and Authenticate Yourself to the System
- In the Username field of the login screen, type your username.
Be sure to type your username exactly as your administrator assigned it to
you. Pay attention to spelling and capitalization.
- If you made an error, restart.
- Confirm your entry.
Press Return to confirm your username.
Caution - You should never see the trusted stripe when the login screen appears. If
you ever see the trusted stripe while attempting to log in or unlock
the screen, do not type your password. There is a possibility that you
are being spoofed. A spoof is when an intruder's program is masquerading as
a login program to capture passwords. Contact your security administrator immediately.
- Type your password in the password entry field, and press Return.
For security purposes, the characters do not display in the field. The system
compares the login name and password against a list of authorized users. TroubleshootingIf the password that you provided is incorrect, a dialog box appears with
the message: Login incorrect; please try again. Click OK to dismiss the error dialog box. Then, type the correct
password.
Check Messages and Select Session TypeIf you do not restrict yourself to a single label, you can
view data at different labels. The range in which you can operate is
bounded at the upper end by the session clearance and at the lower
end by the minimum label that your administrator assigned to you.
- In the Last Login dialog box, check that the time of your
last session is accurate.
Always check that nothing is suspicious about the last login, such as an
unusual time of day. If you have reason to believe that the time
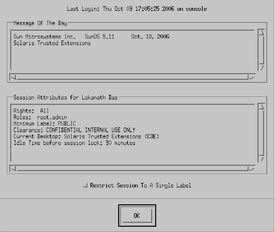
is not accurate, contact your security administrator. Figure 2-1 Last Login Dialog Box
- Check for any messages from the administrator.
The Message of the Day field can contain warnings about scheduled maintenance or security
problems. Always review the information in this field.
- Examine the security attributes of your session.
As Figure 2-1 shows, the Last Login dialog box indicates any roles that you
can assume, your minimum label, and other security characteristics.
- (Optional) If you are permitted to log in to a multilevel session, decide if
you want a single-label session.
Click the Restrict Session to a Single Label button to log in to
a single-label session. You are presented with a label builder. If you are logging in
at a single label, the label builder describes your session label. In a
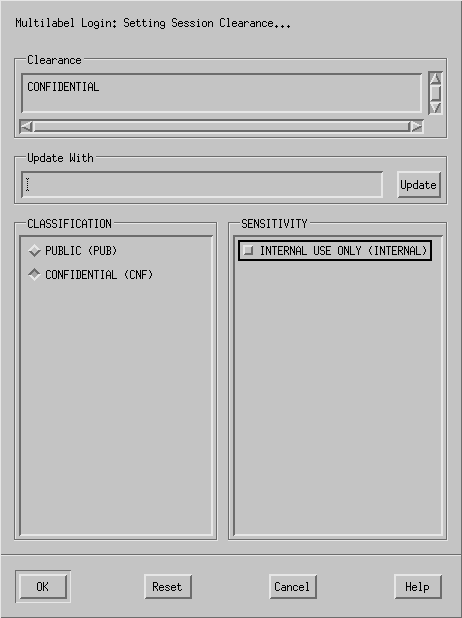
multilabel system, the label builder enables you to choose your session clearance.
- Confirm your label choice.
Figure 2-2 Label Builder
- Accept the default, unless you have a reason not to.
- For a multilevel session, select a clearance.
Deselect the current clearance, and click a classification and a sensitivity label. Or, in the Clearance field, type a clearance. Or, in the Update With field, type a label.
- For a single-level session, select a label.
Deselect the current label, and click a different classification. Or, in the Update With field, type a label.
- Click OK.
The trusted desktop appears.
Troubleshoot Login Problems
- If your username or password is not recognized, check with the administrator.
- If your label range is not permitted on your workstation, check with the
administrator.
Workstations can be restricted to a limited range of session clearances and labels.
For example, a workstation in a lobby might be limited to PUBLIC
labels only. If the label or session clearance that you specify is not
accepted, check with an administrator to determine if the workstation is restricted.
- If you have customized your shell initialization files and cannot log in, you
have the following two options.
- Contact your system administrator to correct the situation.
- If you can become root, log in to a failsafe session.
In a standard login, the shell initialization files are sourced at startup to
provide a customized environment. In a failsafe login, the default values are applied
to your system and no shell initialization files are sourced. In Trusted Extensions, failsafe login is protected. Only superuser can access failsafe login.
- As in the Solaris OS, choose Options –> Failsafe Session on the login
screen.
- When prompted, provide your username and password.
- When prompted for an additional password, provide the password for root.
|
