| |
Printing mailing labels
Before beginning this process, check to see what brand and type of labels you have.
To print mailing labels:
-
Click File > New > Labels.
-
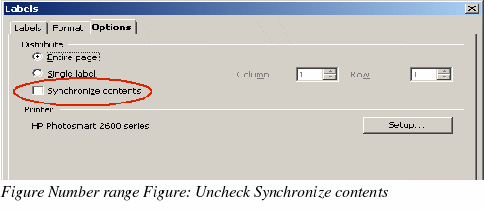
On the Labels dialog, go to the Options tab and uncheck Synchronize contents if it is checked (Figure 274).
|
Note
|
If you need to suppress blank lines in some of your labels, read “Removing blank lines in labels†on page 283.
|
-
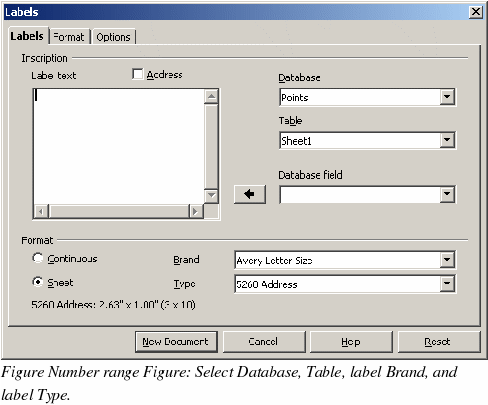
On the Labels tab (Figure 275), select the Database and Table. Select the Brand of labels to be used, and then select the Type of label.
-
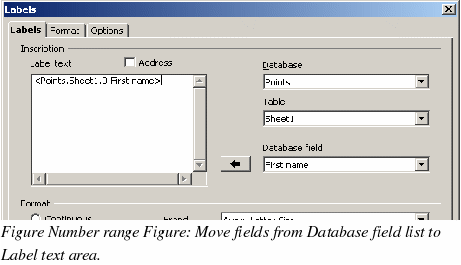
Click the dropdown arrow under Database field. Select the first field to be used in the label (in this example, First name). Click the left arrow button to move this field to the Label text area (Figure 276).
-
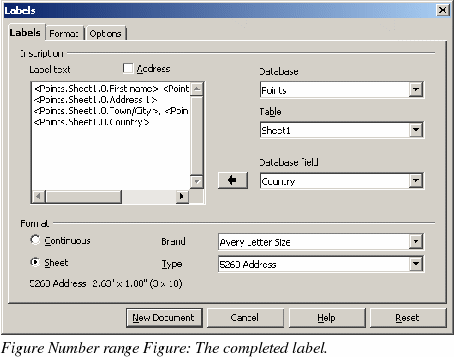
Continue adding fields and inserting desired punctuation, spaces, and line breaks until the label is composed. Figure 277 shows the completed label.
-
Click New Document.
-
Click File > Print. The following dialog appears. Click Yes. Do not select the checkbox.

-
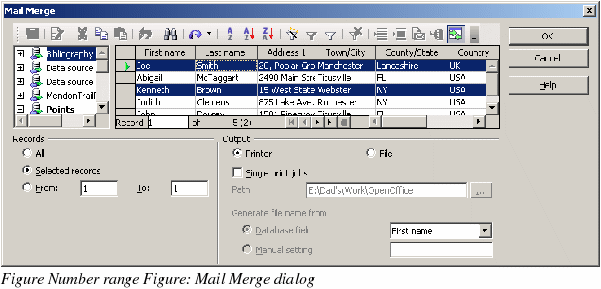
In the Mail Merge dialog (Figure 278), you can choose to print all records or selected records. To select records to be printed, use Ctrl+click to select non-contiguous records. To select a contiguous block of records, select the first record in the block, scroll to the last record in the block, and Shift+click on the last record.
-
Click OK to send the letters direct to the printer. If you wish to check the labels before printing, see “Saving as a file rather than printing†on page 279 for instructions.
|
|
