Adding and formatting notes
Notes
view provide a convenient way to create reminders or add extra
information to the slides of the presentation. Notes are not
displayed during a slide show, so with the dual monitor support
feature available since OOo 2.1, you can use notes as a presentation
cue. You can also print the notes pages and use them as handouts.
To
add notes to a slide:
In
the Slides pane, select the slide to which you want to add notes.
Switch
to Notes view (click the tab in the main work area or select View
> Notes from the menu
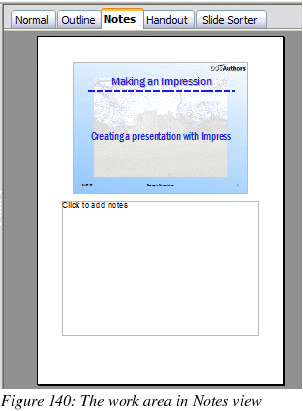
bar). The main work area looks like Figure 140.
Click
in the text box showing “Click to add notes” and type or paste
text or graphics as needed.
To
add notes to another slide, select it in the Slides pane. The Notes
view changes to show the selected slide.
When
done entering notes, return to Normal view.
Formatting
notes
It
is highly recommended to use the Notes Master and the Notes
Presentation style to format the appearance of notes, rather than
formatting them for each slide individually.
All
the formatting guidelines given in this section can be applied to
either the Notes Master or to the Notes Presentation style.
To
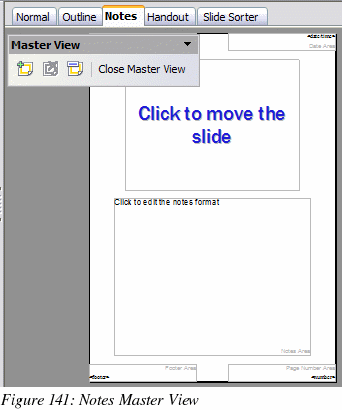
open the Notes Master (Figure 141),
choose View > Master > Notes Master
from the menu bar.
Formatting
the Notes page
To
format the Notes page:
Switch
to Notes view (click the tab in the main work area or select View
> Notes from the menu
bar).
Select
Format > Page from
the menu bar, or right-click and choose Page Setup
from the pop up menu to open the Page Setup dialog, shown in
Figure 142.
Set
the desired parameters. The Page Setup dialog for notes is the same
as the dialog for slides. Refer to “Formating the slide or page area”
on page 181 for a description of this dialog. The only difference
is that by default the Notes page orientation is set to portrait
and the format is A4.
Click
OK to close the
dialog.

Setting
automatic layout options
In
Notes view, Impress creates four areas where you can put information
about the presentation:
Header area
Date
and Time area
Footer
area
Slide
number area
To customize these
fields, proceed as follows:
Switch
to Notes view from the corresponding tab in the work area or by
selecting View > Notes
from the main menu, or open the Notes Master (View
> Master > Notes Master).
Select
Insert > Date and Time
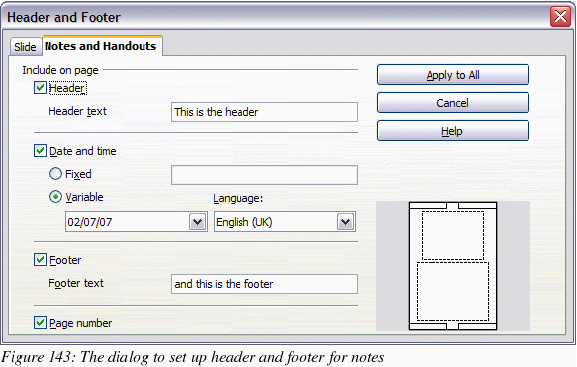
from the main menu to display the Header and Footer dialog. Select
the Notes and Handout
tab (Figure 143).
Select
the checkboxes to activate the corresponding areas. For the Header
and Footer, type the text in the edit fields.
For
the Date and time, select between Fixed
(enter in the edit box the date and time that should be displayed)
or Variable (the
date and time of the slide creation will be inserted in the notes
pages). Use the two drop down menus to select the format of
the date and the language.
If
the Page number checkbox is activated, to format the type of
numbering refer to “Formatting the Notes page” on page 186).
Click
the Apply to All
button to save these settings and close the dialog.
Text
formatting
When
text is inserted in the Notes text box, it is automatically
formatted using the Notes style from the Presentation styles. The
best way to format the notes text is therefore to modify this style
to suit your needs. Refer to Chapter 2 to learn how to work with
styles.
If
manual formatting is required, for example to highlight a particular
section of the notes, the guidelines given in Chapter 3 apply.
Advanced
Notes formatting
You can make other
changes to the Notes pages. For example, you can:
Move the text box
and the slide image around the page
Resize
the slide image and text box
Add
other text boxes to the page
Printing
notes
Choose File
> Print from the menu bar.
Click
the Options
button on the Print dialog.
In
the Contents
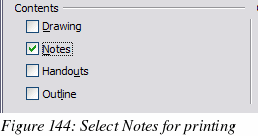
section of the Printer Options dialog, make sure that only the
Notes checkbox is
selected (Figure 144).
Make
any other adjustments needed on the Printer Options dialog, then
click OK to save
the changes and return to the Print dialog.
On
the Print dialog, make any needed changes and then click OK
to print.
For
more about printing slides, notes, and handouts, see Chapter 9.
Exporting
notes to PDF
Choose
File > Export as PDF
from the menu bar and name the file.
In
the PDF Options dialog, choose the General
tab.
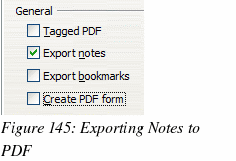
Under
General,
make sure that Export notes
is checked and then click OK.
The
notes pages follow the presentation in the PDF (that is, if your
presentation has 10 slides, the PDF contains 10 pages, each with one
slide, followed by 10 pages with notes formatted for paper). If you
want only the Notes pages, you will need to use some other program
to remove the unwanted pages of slides from the PDF.
