23.13. Disk Partitioning Setup
It is always a good idea to back up any data that you have on your systems. For example, if you are upgrading or creating a dual-boot system, you should back up any data you wish to keep on your storage devices. Mistakes do happen and can result in the loss of all your data.
If you install Red Hat Enterprise Linux in text mode, you can only use the default partitioning schemes described in this section. You cannot add or remove partitions or file systems beyond those that the installer automatically adds or removes. If you require a customized layout at installation time, you should perform a graphical installation over a VNC connection or a kickstart installation.
Furthermore, advanced options such as LVM, encrypted filesystems, and resizable filesystems are available only in graphical mode and kickstart.
Partitioning allows you to divide your storage devices into isolated sections, where each section behaves as a separate Linux device. Partitioning is particularly useful if you run multiple operating systems, or wish to enforce a logical or functional distinction between your storage partitions (such as a /home partition that persistently contains user information).
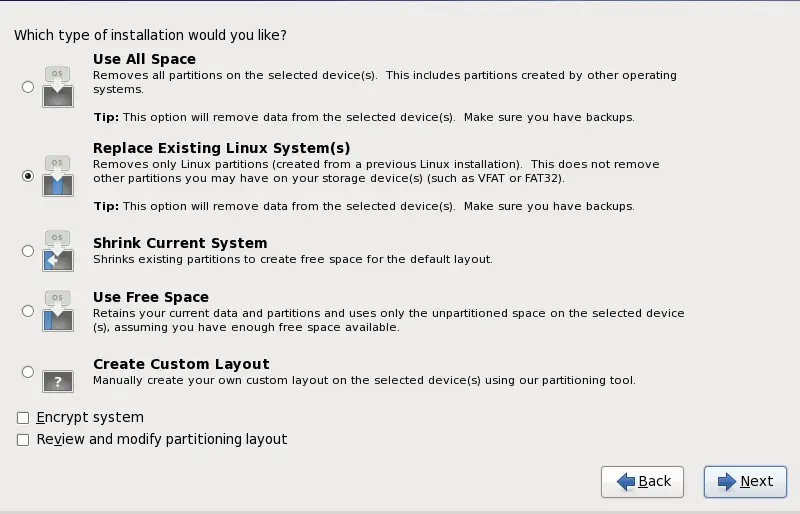
On this screen you can choose to create the default partition layout in one of four different ways, or choose to partition storage devices manually to create a custom layout.
The first four options allow you to perform an automated installation without having to partition your storage devices yourself. If you do not feel comfortable with partitioning your system, choose one of these options and let the installation program partition the storage devices for you. Depending on the option that you choose, you can still control what data (if any) is removed from the system.
Your options are:
- Use All Space
-
Select this option to remove all partitions on your storage drives (this includes partitions created by other operating systems such as z/VM or z/OS).
If you select this option, all data on the selected DASD and SCSI storage devices is removed by the installation program.
- Replace Existing Linux System(s)
-
Select this option to remove only Linux partitions (partitions created from a previous Linux installation). This does not remove other partitions you may have on your storage devices (such as z/VM or z/OS partitions).
- Shrink Current System
-
Select this option to resize your current data and partitions manually and install a default Red Hat Enterprise Linux layout in the space that is freed.
If you shrink partitions on which other operating systems are installed, you might not be able to use those operating systems. Although this partitioning option does not destroy data, operating systems typically require some free space in their partitions. Before you resize a partition that holds an operating system that you might want to use again, find out how much space you need to leave free.
- Use Free Space
-
Select this option to retain your current data and partitions and install Red Hat Enterprise Linux in the unused space available on the storage drives. Ensure that there is sufficient space available on the storage drives before you select this option — refer to
Section 18.1, “Pre-Installation”.
- Create Custom Layout
-
Choose your preferred partitioning method by clicking the radio button to the left of its description in the dialog box.
Select
Encrypt system to encrypt all partitions except the
/boot partition. Refer to
Appendix C, Disk Encryption for information on encryption.
To review and make any necessary changes to the partitions created by automatic partitioning, select the Review option. After selecting Review and clicking Next to move forward, the partitions created for you by anaconda appear. You can make modifications to these partitions if they do not meet your needs.
Click Next once you have made your selections to proceed.