Chapter 14. Keyboard Configuration
This chapter describes how to change the keyboard layout, as well as how to add the Keyboard Indicator applet to the panel. It also covers the option to enforce a typing break, and explains both advantages and disadvantages of doing so.
14.1. Changing the Keyboard Layout
The installation program allowed you to configure a keyboard layout for your system. However, the default settings may not always suit your current needs. To configure a different keyboard layout after the installation, use the Keyboard Preferences tool.
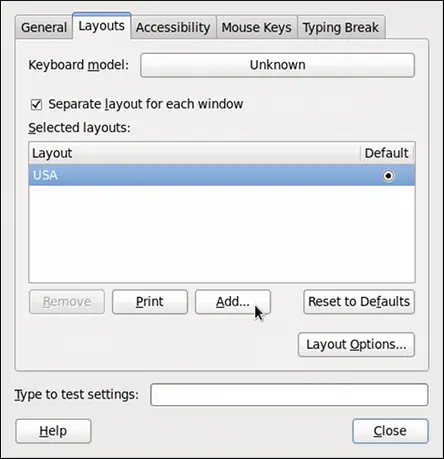
To open Keyboard Layout Preferences, select → → from the panel, and click the Layouts tab.
You will be presented with a list of available layouts. To add a new one, click the Add... button below the list, and you will be prompted to chose which layout you want to add.
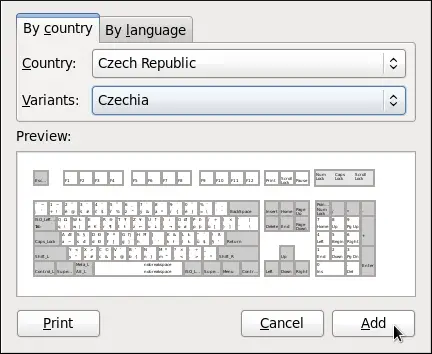
Currently, there are two ways how to chose the keyboard layout: you can either find it by the country it is associated with (the By country tab), or you can select it by the language (the By language tab). In either case, first select the desired country or language from the Country or Language pulldown menu, then specify the variant from the Variants menu. The preview of the layout changes immediately. To confirm the selection, click Add.
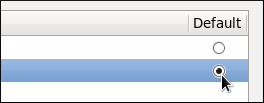
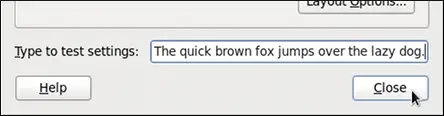
The layout should appear in the list. To make it the default, select the radio button next to its name. The changes take effect immediately. Note that there is a text-entry field at the bottom of the window where you can safely test your settings. Once you are satisfied, click Close to close the window.
By default, changing the keyboard layout affects the active window only. This means that if you change the layout and switch to another window, this window will use the old one, which might be confusing. To turn this unfortunate behavior off, unselect the Separate layout for each window check box.
Doing this has its drawbacks though, as you will no longer be able to chose the default layout by selecting the radio button as shown in
Figure 14.3, “Selecting the default layout”. To make the layout the default, simply drag it at the beginning of the list.