Creating Roles and Users in Trusted Extensions
If you are already using administrative roles, you might want to add a
Security Administrator role. For sites that have not yet implemented roles, the procedure
for creating them is similar to the procedure in the Solaris OS. Trusted
Extensions adds the Security Administrator role and requires the use of the Solaris
Management Console to administer a Trusted Extensions domain.
If site security requires two people to create user and role accounts, create
custom rights profiles and assign them to roles to enforce separation of duty.
Create Rights Profiles That Enforce Separation of Duty
Skip this procedure if separation of duty is not a site security requirement. If
your site requires separation of duty, you must create these rights profiles and
roles before you populate the LDAP server.
This procedure creates rights profiles that have discrete capabilities to manage users. When
you assign these profiles to distinct roles, two roles are required to create
and configure users. One role can create users, but cannot assign security attributes.
The other role can assign security attributes, but cannot create users. When you
log in to the Solaris Management Console in a role that is
assigned one of these profiles, only the appropriate tabs and fields are available to
the role.
Before You Begin
You must be superuser, in the root role, or in the Primary Administrator
role. When you start this procedure, the Solaris Management Console must be closed.
- Create copies of the default rights profiles that affect user configuration.
- Copy the prof_attr file to the prof_attr.orig file.
- Open the prof_attr file in the trusted editor.
# /usr/dt/bin/trusted_edit /etc/security/prof_attr
- Copy the three rights profiles and rename the copies.
System Administrator:::Can perform most non-security...
Custom System Administrator:::Can perform most non-security...

User Security:::Manage passwords...
Custom User Security:::Manage passwords...

User Management:::Manage users, groups, home...
Custom User Management:::Manage users, groups, home...
- Save the changes.
- Verify the changes.
# grep ^Custom /etc/security/prof_attr
Custom System Administrator:::Can perform most non-security...
Custom User Management:::Manage users, groups, home...
Custom User Security:::Manage passwords...
Copying a rights profile rather than modifying it enables you to upgrade the
system to a later Solaris release and retain your changes. Because these rights
profiles are complex, modifying a copy of the default profile is less prone
to error than building the more restrictive profile from scratch.
- Start the Solaris Management Console.
# /usr/sbin/smc &
- Select the This Computer (this-host: Scope=Files, Policy=TSOL) toolbox.
- Click System Configuration, then click Users.
You are prompted for your password.
- Type the appropriate password.
- Double-click Rights.
- Modify the Custom User Security rights profile.
You restrict this profile from creating a user.
- Double-click Custom User Security.
- Click the Authorizations tab, then perform the following steps:
- From the Included list, remove the Manage Users and Roles authorization.
The following User Accounts rights remain:
Audit Controls
Label and Clearance Range
Change Password
View Users and Roles
Modify Extended Security Attributes
- Add the Manage Privileges right to the Included list.
- Click OK to save your changes.
- Modify the Custom User Management profile.
You restrict this profile from setting a password.
- Double-click Custom User Management.
- Click the Authorizations tab, then perform the following steps:
- Drag the scrollbar for the Included list to User Accounts.
- From the Included list, remove the Modify Extended Security Attributes authorization.
The following User Accounts rights remain:
Manage Users and Roles
View Users and Roles
- Save your changes.
- Modify the Custom System Administrator rights profile.
The User Management profile is a supplementary profile in this profile. You prevent the
system administrator from setting a password.
- Double-click Custom System Administrator.
- Click the Supplementary Rights tab, then perform the following steps:
- Remove the User Management rights profile.
- Add the Custom User Management rights profile.
- Move the Custom User Management rights profile above the All rights profile.
- Save your changes.
Next Steps
To prevent the default profiles from being used, see Step 8 in Verify That the Trusted Extensions Roles Work
after you verify that the custom profiles enforce separation of duty.
Create the Security Administrator Role in Trusted Extensions
Role creation in Trusted Extensions is identical to role creation in the
Solaris OS. However, in Trusted Extensions, a Security Administrator role is required. To create
a local Security Administrator role, you can also use the command-line interface, as
in Example 4-6.
Before You Begin
You must be superuser, in the root role, or in the Primary Administrator
role.
To create the role on the network, you must have completed Configuring the Solaris Management Console for LDAP (Task Map).
- Start the Solaris Management Console.
# /usr/sbin/smc &
- Select the appropriate toolbox.
- To create the role locally, use This Computer (this-host: Scope=Files, Policy=TSOL).
- To create the role in the LDAP service, use This Computer (ldap-server:
Scope=LDAP, Policy=TSOL).
- Click System Configuration, then click Users.
You are prompted for your password.
- Type the appropriate password.
- Double-click Administrative Roles.
- From the Action menu, choose Add Administrative Role.
- Create the Security Administrator role.
Use the following information as a guide:
Role name – secadmin
Full name – Security Administrator
Description – Site Security Officer No proprietary information here.
Role ID Number – ≥100
Role shell – Administrator's Bourne (profile shell)
Create a role mailing list – Leave the checkbox selected.
Password and confirm – Assign a password of at least 6 alphanumeric characters.
The password for the Security Administrator role, and all passwords, must be difficult to guess, thus reducing the chance of an adversary gaining unauthorized access by attempting to guess passwords.
Note - For all administrative roles, make the account Always Available, and do not set password expiration dates.
Available and Granted Rights – Information Security, User Security
If site security does not require separation of duty, select the Information Security and the default User Security rights profiles.
If site security requires separation of duty, select the Information Security and the Custom User Security rights profiles.
Home Directory Server – home-directory-server
Home Directory Path – /mount-path
Assign Users– This field is automatically filled in when you assign a role to a user.
- After creating the role, check that the settings are correct.
Select the role, then double-click it.
Review the values in the following fields:
Available Groups – Add groups if required.
Trusted Extensions Attributes – Defaults are correct.
For a single-label system where the labels must not be visible, choose Hide for Label: Show or Hide.
Audit Excluded and Included – Set audit flags only if the role's audit flags are exceptions to the system settings in the audit_control file.
- To create other roles, use the Security Administrator role as a guide.
For examples, see How to Create and Assign a Role by Using the GUI in System Administration Guide: Security Services. Give each role a unique ID, and assign to
the role the correct rights profile. Possible roles include the following:
admin Role – System Administrator Granted Rights
primaryadmin Role – Primary Administrator Granted Rights
oper Role – Operator Granted Rights
Example 4-6 Using the roleadd Command to Create a Local Security Administrator Role
In this example, the root user adds the Security Administrator role to the
local system by using the roleadd command. For details, see the roleadd(1M) man page.
The root user consults Table 1-2 before creating the role. At this site,
separation of duty is not required to create a user.
# roleadd -c "Local Security Administrator" -d /export/home1 \
-u 110 -P "Information Security,User Security" -K lock_after_retries=no \
-K idletime=5 -K idlecmd=lock -K labelview=showsl \
-K min_label=ADMIN_LOW -K clearance=ADMIN_HIGH secadmin
The root user provides an initial password for the role.
# passwd -r files secadmin
New Password:        <Type password>
Re-enter new Password: <Retype password>
passwd: password successfully changed for secadmin
#
To assign the role to a local user, see Example 4-7.
Create a Restricted System Administrator Role
Skip this procedure if separation of duty is not a site security requirement.
In this procedure, you assign a more restrictive rights profile to the System
Administrator role.
Before You Begin
You must be superuser, in the root role, or in the Primary Administrator
role.
You have completed Create Rights Profiles That Enforce Separation of Duty. You are using the same toolbox that you used
to create the rights profile.
- In the Solaris Management Console, create the System Administrator role.
For assistance, see Create the Security Administrator Role in Trusted Extensions.
- Assign the Custom System Administrator rights profile to the role.
- Save the changes.
- Close the Solaris Management Console.
Create Users Who Can Assume Roles in Trusted Extensions
To create a local user, you can use the command-line interface, as
in Example 4-7, instead of the following procedure. Where site security policy permits, you
can choose to create a user who can assume more than one administrative
role.
For secure user creation, the System Administrator role creates the user, and the
Security Administrator role assigns security-relevant attributes, such as a password.
Before You Begin
You must be superuser, in the root role, in the Security Administrator role,
or in the Primary Administrator role. The Security Administrator role has the least
amount of privilege that is required for user creation.
The Solaris Management Console is displayed. For details, see Create the Security Administrator Role in Trusted Extensions.
- Double-click User Accounts in the Solaris Management Console.
- From the Action menu, choose Add User → Use Wizard.
Caution - The names and IDs of roles and users come from the same
pool. Do not use existing names or IDs for the users that you
add.
- Follow the online help.
You can also follow the procedures in How to Add a User With the Solaris Management Console’s Users Tool in System Administration Guide: Basic Administration.
- After creating the user, double-click the created user to modify the settings.
Note - For users who can assume roles, make the user account Always Available, and
do not set password expiration dates.
Ensure that the following fields are correctly set:
Description – No proprietary information here.
Password and confirm – Assign a password of at least 6 alphanumeric characters.
Note - When the initial setup team chooses a password, the team must select a password that is difficult to guess, thus reducing the chance of an adversary gaining unauthorized access by attempting to guess passwords.
Account Availability – Always Available.
Trusted Extensions Attributes – Defaults are correct.
For a single-label system where the labels must not be visible, choose Hide for Label: Show or Hide.
Account Usage – Set Idle time and Idle action.
Lock account – Set to No for any user who can assume a role.
- Close the Solaris Management Console.
- Customize the user's environment.
- Assign convenient authorizations.
After checking your site security policy, you might want to grant your first
users the Convenient Authorizations rights profile. With this profile, you can enable users
to allocate devices, print PostScriptTM files, print without labels, remotely log in, and shut
down the system. To create the profile, see How to Create a Rights Profile for Convenient Authorizations.
- Customize user initialization files.
See Chapter 13, Managing Users, Rights, and Roles in Trusted Extensions (Tasks).
Also see Managing Users and Rights With the Solaris Management Console (Task Map).
- Create multilabel copy and link files.
On a multilabel system, users and roles can be set up with files
that list user initialization files to be copied or linked to other labels.
For more information, see .copy_files and .link_files Files.
Example 4-7 Using the useradd Command to Create a Local User
In this example, the root user creates a local user who can assume
the Security Administrator role. For details, see the useradd(1M) and atohexlabel(1M) man
pages.
First, the root user determines the hexadecimal format of the user's minimum label
and clearance label.
# atohexlabel public
0x0002-08-08
# atohexlabel -c "confidential restricted"
0x0004-08-78
Next, the root user consults Table 1-2, and then creates the user.
# useradd -c "Local user for Security Admin" -d /export/home1 \
-K idletime=10 -K idlecmd=logout -K lock_after_retries=no
-K min_label=0x0002-08-08 -K clearance=0x0004-08-78 -K labelview=showsl jandoe
Then, the root user provides an initial password.
# passwd -r files jandoe
New Password:    <Type password>
Re-enter new Password: <Retype password>
passwd: password successfully changed for jandoe
#
Finally, the root user adds the Security Administrator role to the user's definition.
The role was created in Create the Security Administrator Role in Trusted Extensions.
# usermod -R secadmin jandoe
Verify That the Trusted Extensions Roles Work
To verify each role, assume the role. Then, perform tasks that only that
role can perform.
Before You Begin
If you have configured DNS or routing, you must reboot after you
create the roles and before you verify that the roles work.
- For each role, log in as a user who can assume the
role.
- Open the Trusted Path menu.
- In Trusted CDE, click the workspace switch area.
- In Trusted GNOME, click your user name in the trusted stripe.
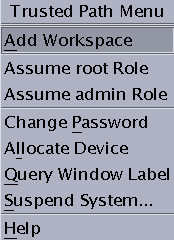
- From the menu, assume the role.
- In the role workspace, start the Solaris Management Console.
$ /usr/sbin/smc &
- Select the appropriate scope for the role that you are testing.
- Click System Services, and navigate to Users.
You are prompted for a password.
- Type the role password.
- Double-click User Accounts.
- Click a user.
The System Administrator role should be able to modify fields under the General, Home Directory, and Group tabs.
If you configured the roles to enforce separation of duty, then the System Administrator role cannot set the user's initial password.
The Security Administrator role should be able to modify fields under all tabs.
If you configured the roles to enforce separation of duty, then the Security Administrator role cannot create a user.
The Primary Administrator role should be able to modify fields under all tabs.
- (Optional) If you are enforcing separation of duty, prevent the default rights profiles from
being used.
Note - When the system is upgraded to a newer version of the Solaris
OS, the System Administrator, User Management, and User Security default profiles are replaced.
In the trusted editor, perform one of the following steps:
- Remove the three rights profiles from the prof_attr file.
Removal prevents an administrator from viewing or assigning these profiles. Also, remove the
prof_attr.orig file.
- Comment out the three rights profiles in the prof_attr file.
Commenting out the rights profiles prevents these profiles from being viewed in the
Solaris Management Console or from being used in commands that manage users. The
profiles and their contents can still be viewed in the prof_attr file.
- Type a different description for the three rights profiles in the prof_attr file.
Edit the prof_attr file to change the description field of these rights
profiles. For example, you might replace the descriptions with Do not use this profile. This change warns
an administrator to not use the profile, but does not prevent the profile
from being used.
Enable Users to Log In to a Labeled Zone
When the host is rebooted, the association between the devices and the underlying
storage must be re-established.
Before You Begin
You have created at least one labeled zone. That zone is not
being used for cloning.
- Reboot the system.
- Log in as the root user.
- Restart the zones service.
# svcs zones
STATE          STIME    FMRI
offline        -        svc:/system/zones:default
# svcadm restart svc:/system/zones:default
- Log out.
Regular users can now log in. Their session is in a labeled zone.


