| |
Removing blank lines in labels
The process for removing blank lines in labels is a bit different.
-
When setting up your labels (as described in “Printing mailing labels†starting on page 262), select the Synchonise contents checkbox on the Options tab of the Labels dialog (Figure 274). Continue as described in that section.
-
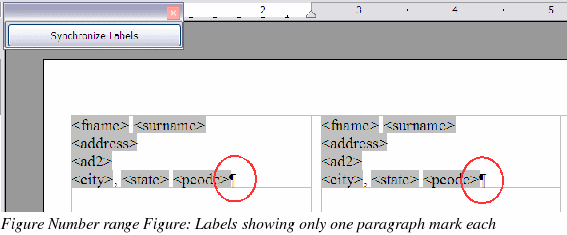
When you click New Document, a page of labels is displayed, showing the field names. If you do not already have paragraph markers showing, display them now. (Click the Nonprinting Characters icon, which looks like a backwards P.) Notice there is only one paragraph mark in each label, at the end of the last line (Figure 302).
-
To make this technique work, you need to have a paragraph mark at the end of each line. To do this, go to the first label (upper left corner), place the cursor at the end of the first line, press Enter, and then press Delete. This inserts a paragraph mark at the end of the first line. Repeat for each of the other lines except the last. Do this only in the first label.
-
Click the Synchronize Labels button in the upper left. Now all the labels have paragraph marks at the end of each line.
-
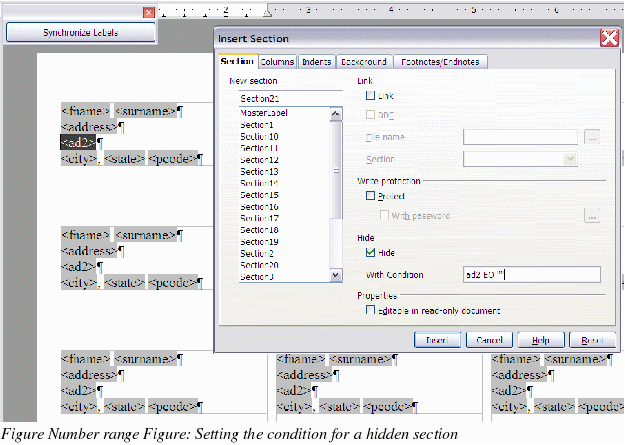
In the first label on the page, select the field you wish to hide if it is blank. In our example, that is <ad2>. Click Insert > Section on the menu bar. In the Insert Section dialog (see Figure 303), select the Hide checkbox. In the With Condition box, type the field name (ad2 in this case) and EQ "". Click Insert.
The <ad2> line in the first label may disappear. Do not be concerned if this happens.
-
Click Synchronize Labels. Now all the labels look the same.
-
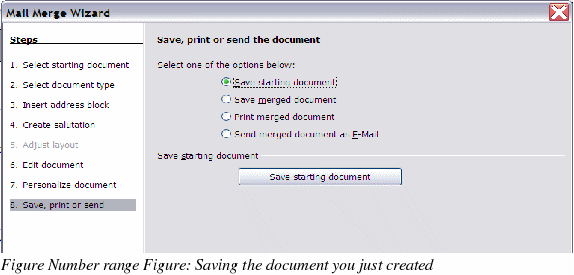
Select Tools > Mail Merge Wizard. In Step 1 of the wizard (Figure 284), select Use the current document. Then select step 8 (Save, print, or send). A labels document is created, and the last page of the Mail Merge Wizard remains open (Figure 304).
-
Select Save starting document and click the Save starting document button. This saves all your work setting up the labels.
-
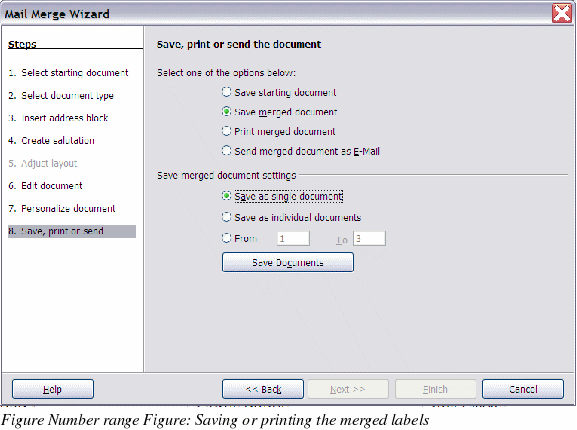
The dialog remains open. Select Save merged document and Save as single document, or select Print merged document. All the pages of labels are printed or saved.
|
|


