Creating a database
The chapter titled “Getting Started with Base†in the Getting Started guide covers in more detail how to create a database. We will give a short guide here to creating a very simple database with OOo Base.
-
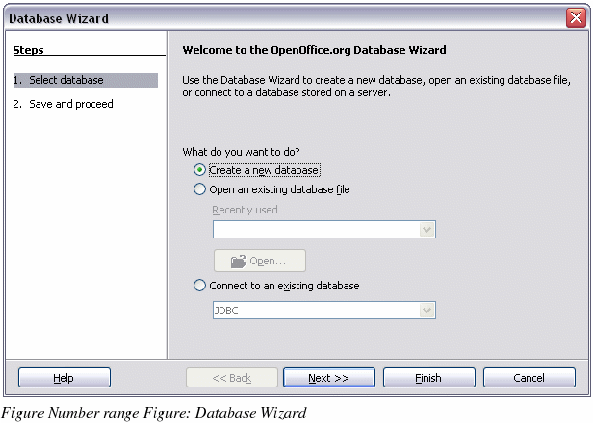
Select File > New > Database to start the Database Wizard (Figure 380).
-
Select Create a new database and click Next.
-
On the next page, select Yes, register the database for me and Open the database for editing. Registering the database just means that it can be accessed from other OOo components such as Writer and Calc. You need to do this if you want to link your forms into it.
-
Click Finish and save your new database, giving it a name. Unlike creating other documents in OOo, databases have to be saved when you first create them.
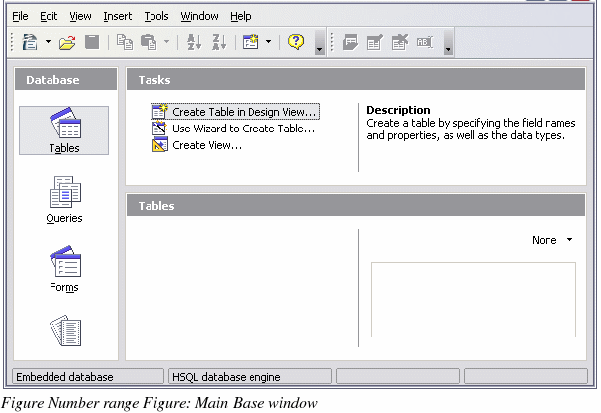
After saving the database, you should see the main Base window (Figure 381), which contains three panels. The left-hand panel is Database, with icons for Tables, Queries, Forms and Reports.
The next step is to create a table. Again, this is covered in more detail in the “Getting Started with Base†chapter in the Getting Started guide. Here we are going to create a small table as an example.
-
Choose Tables in the left-hand column, then choose Create Table in Design View under Tasks.
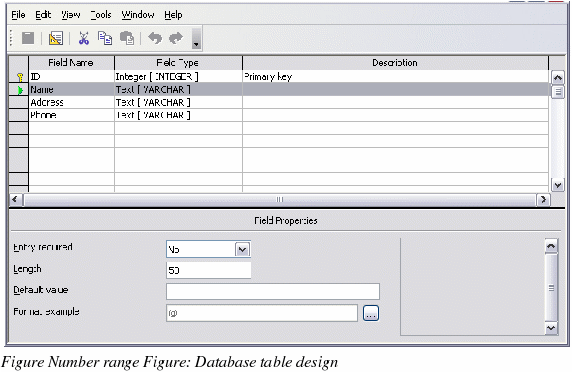
Use the Table Design window (Figure 382) to tell Base which fields to create. We will have just three fields: Name, Address and Telephone.
-
On the first line, enter under Field Name ID and set the Field Type to Integer [INTEGER]. In the gray box at the left of the line, right-click and select Primary Key, bringing up a key icon in the box. In the Field Properties at the bottom of the window is an Auto Value option; change this to Yes.
|
TIP
|
Setting up the Primary Key field with Auto Value set to Yes is an important step. If this is not done, the form you create later will be much trickier to use and may generate errors for the user. Make sure you get this step right!
|
-
On three lines, enter under Field Name Name, Address and Telephone. Accept the default Field Type of Text [VARCHAR] and leave Description blank.
-
Save the table (File > Save). You will be prompted to name it (the name can be anything you like).
-
Finally, save the whole database from the main Base window (File > Save).