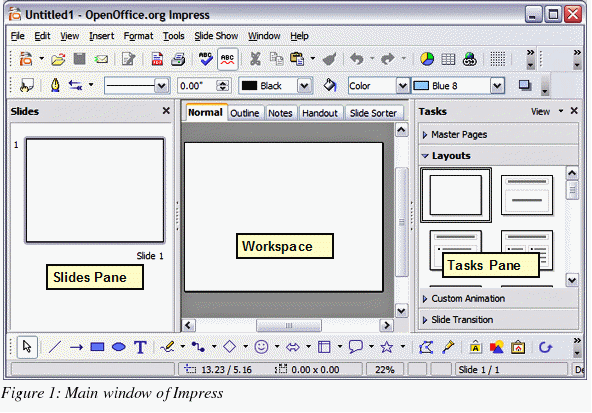
Parts of the main Impress window
The
main Impress window (Figure 1) has three parts: the Slides
pane,
the Workspace,
and the Tasks
pane.
Additionally, several toolbars can be displayed or hidden during the
creation of a presentation.
|
Tip
|
You
can remove the Slides
pane or
Tasks
pane from
view by clicking the X
in the upper right corner. You can also show or hide these panes
using View >
Slide Pane or View
> Task Pane.
|
Slides
pane
The
Slides
pane
contains
thumbnail pictures of the slides in your presentation, in the order
they will be shown (unless you change the order, as described in
Chapter 9). Clicking a slide in this pane selects it and places it
in the Workspace.
While it is there, you can apply any changes desired to that
particular slide.
Several
additional operations can
be performed on one or more slides in the Slides pane:
Add
new slides at any place within the presentation after the first
slide.
Mark
a slide as hidden so that it will not be shown as part of the slide
show.
Delete
a slide from the presentation if it is no longer needed.
Rename
a slide.
Copy
or move the contents of one slide to another (copy and paste, or
cut and paste, respectively).
It
is also possible to perform the following operations, although there
are more efficient methods than using the Slides pane as you will
see in this chapter.
Change
the slide transition following the selected slide or after each
slide in a group of slides.
Change
the sequence of slides in the presentation.
Change
the slide design. (A window opens allowing you to load your own
design.)
Change
slide layout for a group of slides simultaneously. (This requires
using the Layouts section of the Tasks pane.)
Tasks
pane
The
Tasks
pane has four
sections:
|
Tip
|
Press
F11
to open the Styles
and Formatting
window, where you can modify the styles used in any slide
master to
suit your purposes. This can be done at any time. See Chapter 2
for more information.
|
Layout:
Twenty
pre-packaged layouts are shown. You can choose the one you want,
use it as it is or modify it to your own requirements. At present
it is not possible to create custom layouts.
Custom
Animation:
This section contains a variety of animation effects that can be
applied at any time to selected elements of a slide.
Slide
Transition: Fifty-six transitions are available,
including No
Transition. You can select the transition speed
(slow, medium, fast). You can also choose between an automatic or
manual transition, and for how long you want the selected slide to
be shown (automatic transition only).
Workspace
The
Workspace
has five tabs: Normal,
Outline,
Notes,
Handout,
and Slide Sorter,
as seen in Figure 2. These five
tabs are called View
Buttons. There are
also many toolbars that can be used during slide creation; they are
revealed by selecting them with View
> Toolbars. The
actual Workspace
section is below the View Buttons.
This is where you assemble the various parts of your selected slide.
Each
view is designed to ease the completion of certain tasks. In
summary:
Normal
view
is the main view for
creating individual slides. Use this view to format and design
slides and to add text, graphics, and animation effects.
Outline
view
shows
topic titles, bulleted lists, and numbered lists for each slide in
outline format. Use this view to rearrange the order of slides,
edit titles and headings, rearrange the order of items in a list,
and add new slides.
Notes
view
lets you add notes to
each slide that are not seen when the presentation is shown.
Slide
Sorter view
shows a thumbnail of each
slide in order. Use this view to rearrange the order of
slides, produce a timed slide show, or add transitions between
selected slides.
Handout
view
lets you print your slides for a handout. You can choose one, two,
three, four, or six slides per page from Tasks
pane > Layouts.
Thumbnails can be re-arranged
in this view by dragging and dropping them.
Normal
view
There
are two ways to place a slide in the Slide Design area of the Normal
view: clicking the slide thumbnail in the Slides pane or using the
Navigator.
To
open the Navigator, click the Navigator
button in the Standard Toolbar
 or press Ctrl+Shift+F5
and select a slide by scrolling down the Navigator list until you
find the one you want and then double-click it. For more about using
the Navigator, see page 11.
or press Ctrl+Shift+F5
and select a slide by scrolling down the Navigator list until you
find the one you want and then double-click it. For more about using
the Navigator, see page 11.
Outline
view
Outline view
contains all of the slides of the presentation in their numbered
sequence. Only the text in each slide is shown. Slide names are not
included.
Outline view serves
at least two purposes.
Making changes in the text of a slide:
You can add or delete
text in a slide just as you can in the Normal view.
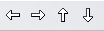
Figure 2:
Arrow buttons
You can move the paragraphs
of text in the selected slide up or down by using the up and down
arrow buttons (Move Up or Move Down) on the Text Formatting
toolbar (Figure 2).
You can change the
outline level for any of the paragraphs in a slide using the left
and right arrow buttons (Promote or Demote).
You can both move a paragraph
and change its outline level using a combination of these four
arrow buttons.
Comparing the slides with your
outline (if you have prepared one in advance). If you notice from
your outline that another slide is needed, you can create it
directly in the Outline view or you can return to the Normal view
to create it, then return to review all the slides against your
outline in the Outline view.
If a slide is not in the correct
sequence, you can move it to its proper place.
Click the slide icon of the
slide you wish to move, as indicated in Figure 3.
Drag and drop it where you
want it.
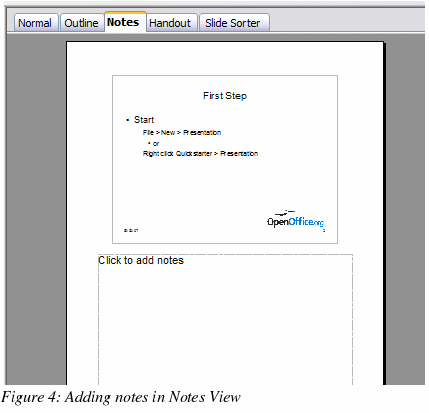
Notes
view
Use the Notes view
to add notes to a slide:
Click the Notes
tab in the Workspace (Figure 4).
Select the slide to which you
will add notes.
In
the text box below the slide, click
on the words “Click to
add notes”
and begin typing.
You
can resize the notes text box using the green resizing handles and
move it by placing the pointer on the border, then clicking and
dragging. To make changes in the text style, press the F11
key to open the Styles and Formatting window.
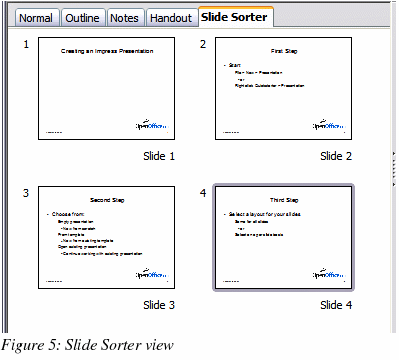
Slide
Sorter view
The Slide Sorter
view contains all of the slide thumbnails (Figure 5). Use this view
to work with a group of slides or with only one slide.
Change
the number of slides per row, if desired:
Check
View > Toolbars >
Slide View to show
the Slide view toolbar
(Figure 6).

Adjust
the number of slides (up to a maximum of 15).
After
you have adjusted the number of slides per row, View > Toolbars >
Slide View will
remove this toolbar from view.
To move a slide in a presentation using the Slide Sorter:
Click the slide. A
thick black border is drawn around it.
Drag and drop it to the
location you want.
As you move the
slide, a black vertical line appears to one side of the slide.
Drag the slide until this
black vertical line is located where you want the slide to be
moved.
To
select a group of slides, use one of these methods:
Use the Control
(Ctrl)
key: Click on the first
slide and, while pressing Control,
select the other desired slides.
Use the Shift
key: Click on the first
slide, and while pressing the Shift
key, select the final slide in the group. This selects all of the
other slides in between the first and the last.
Use the cursor:
Click on the first slide to be selected. Hold down the left
mouse button. Drag the cursor to the last slide thumbnail. A dashed
outline of a rectangle forms as you drag the cursor through the
slide thumbnails and a thick black border is drawn around the
selected slides. Make sure the rectangle includes all the slides
you want to select.
To
move a group of slides:
Select
the group.
Drag
and drop the group to their new location. The same vertical black
line appears to show you where the group of slides will go.
|
Note
|
Selection
of a group of slides works in a rectangular fashion. Slides that
do not fall within a rectangular area cannot be grouped.
|
You
can work with slides in the Slide Sorter view
just as you can in the Slide pane.
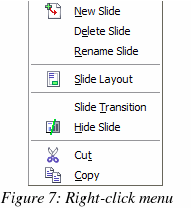
To
make changes, right-click a slide and do the following, using the
pop-up menu (Figure 7):
Add a new slide after the
selected slide.
Delete
or rename the selected slide.
Change
the Slide Layout.
Change
the Slide Transition.
For
one slide, click the slide to select it. Then add the desired
transition.
For
more than one slide, select the group of slides and add the
desired transition.
Mark
a slide as hidden. Hidden slides will not be shown in the slide
show.
Copy
or cut and paste a slide.
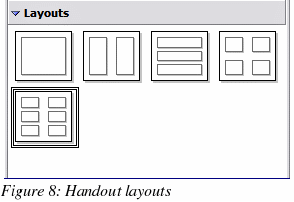
Handout
view
Handout
view is for setting up the layout of your slides for a printed
handout. Click the Handout
tab in the workspace, then choose Layouts
in the tasks pane (Figure 8). You can then choose to print one, two,
three, four, or six slides per page.
To
print a handout:
Select the slides
using the Slide Sorter. (Use the steps listed in selecting a group
of slides on page 9.)
Select File
> Print or press Control+P
to open the Print dialog.
Select Options
in the bottom left corner of the Print dialog.
Check Handouts
in the Contents
section, and then click OK.
Click OK
to close the Print dialog.
Toolbars
The
various Impress toolbars can be displayed or hidden by clicking View
> Toolbars and selecting from the menu. You can also
select the icons that you wish to appear on each toolbar. For more
information, refer to Chapter 4 (Menus and Toolbars) in the Getting
Started guide.
Many
of the toolbars in Impress are similar to the toolbars in OOo Draw.
Refer to the Draw
Guide for details on the functions available and
how to use them.
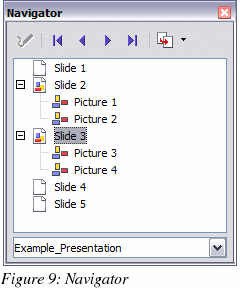
Navigator
The
Navigator (Figure 9) displays all objects contained in a document.
It provides another convenient way to move around a document and
find items in it. The Navigator button is located on the Standard
toolbar. You can also display the Navigator by choosing Edit
> Navigator on the menu bar or pressing Ctrl+Shift+F5.
The
Navigator is more useful if you give your objects (pictures,
spreadsheets, and so on) meaningful names, instead of leaving them
as the default “Object 1” and “Picture 1” shown in Figure 9.