Inserting text
Pasting
text
Text
may be inserted into the text box by copying it from another
document and pasting it into Impress. However, the pasted text will
probably not match the formatting of the surrounding text or that of
the other slides in the presentation. This may be what you want on
some occasions, however in most cases you want to make sure that the
presentation does not become a patchwork of different paragraph
styles, font types, bullet points and so on. There are several ways
to ensure consistency; these methods are explained below.
Pasting
unformatted text
It
is normally good practice to paste text without formatting and apply
the formatting later. To paste without formatting, either press
Control+Shift+V
and then select Unformatted
text from the dialog that appears, or click on the small
black triangle next to the paste symbol in the standard toolbar
 and select Unformatted text. The unformatted text will be
formatted with the outline style at the cursor position in an
AutoLayout text box or with the default graphic style in a normal
text box.
and select Unformatted text. The unformatted text will be
formatted with the outline style at the cursor position in an
AutoLayout text box or with the default graphic style in a normal
text box.
Formatting
pasted text
If
pasting the text into an AutoLayout
area, then to give the pasted text the same look and feel of the
rest of the presentation apply the appropriate outline
style to the text. To do so:
Paste
the text in the desired position. Do not worry if it does not look
right: it will in a minute.
Select
the text you have just pasted (see “Selecting text” on page 58
for details on how to do that).
Select
Format > Default
formatting from the menu bar.
Use
the four arrow buttons in the Text Formatting toolbar
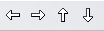 to move the text to the appropriate position and give it the
appropriate outline level. The button with the arrow pointing left
promotes the list entry by one level (for example from Outline 3 to
Outline 2), the right arrow button demotes the list entry by one
level, the up and down arrow buttons move the list entry.
to move the text to the appropriate position and give it the
appropriate outline level. The button with the arrow pointing left
promotes the list entry by one level (for example from Outline 3 to
Outline 2), the right arrow button demotes the list entry by one
level, the up and down arrow buttons move the list entry.
Apply
manual formatting as required to sections of the text (to change
font attributes, tabs, and so on).
If
you are pasting text in a text
box, you can still use styles to quickly format the text.
Note that one and only one graphic style can be applied to the
copied text. To do that:
Paste
the text in the desired position.
Select
the text you have just pasted (see “Selecting text” on page 58
for details).
Select
the desired graphic style.
Apply
manual formatting as required to sections of the text.
|
Tip
|
Presentation
styles are very different from Writer styles and are applied in
quite a different way. Refer to “Using styles to format text”
on page 55 for details.
|
Inserting
special characters
To insert special
characters, such as copyright, math, geometric, or monetary
symbols, or characters from another language:
Click in the place
in the text where you want to insert the character.
Choose
Insert > Special
Character. The Special Characters dialog appears. See Figure 35.
Alternatively if the
 icon is visible, you can click this to bring up the Special
Characters dialog.
icon is visible, you can click this to bring up the Special
Characters dialog.
|
Tip
|
To
show toolbar buttons that are not visible, click on the small
down-arrow on the right end of the tool bar, move the cursor
over Visible
Buttons and then
click on the icon you wish to make visible.
|
Choose
the font and character subset from the Font
and
Subset drop-down menus.
Click
the character you want to insert. You may have to scroll to find
the one you want.
Click
OK.
Selecting
more than one character will insert all those characters. Characters
to be inserted are displayed below the character section in the
order they were selected. They will also be inserted in this order.
If you accidentally click the wrong character, clicking another
character will only add it to the ones being inserted. Click Delete
(all the characters selected
will be deleted), then click the correct
characters.
Inserting
non-breaking spaces and hyphens
Where it is not
desirable for words separated by a space or by a hyphen to span over
two lines, or where an optional hyphen is desired, you can insert a
special formatting mark.
To
access the Formatting marks options, select from the menu bar
Insert > Formatting
marks. Impress supports three formatting marks:
Non-breaking
space: A non-breaking space between two words prevents
these two words being separated over two lines. Press Control+Space
bar on the keyboard to insert a non-breaking
space.
Non-breaking
hyphen: A non-breaking hyphen keeps the two words
separated by the hyphen on the same line.
Optional
hyphen: An invisible hyphen that is activated (thus
breaking the word) only when the word is too long to fit on one
line.
|
Caution

|
In
OOo Writer a non-breaking hyphen can be inserted by pressing
Control+Minus sign.
This shortcut does not work in Impress.
|


