Applying an animation effect
In Normal View, display the desired slide. Select the text or object you want to animate. An object such as a graphic or an entire text box will have green handles around it when selected. If you choose only a portion of the text in a text box, you may not see any green handles.
In the Tasks pane, choose Custom Animation.
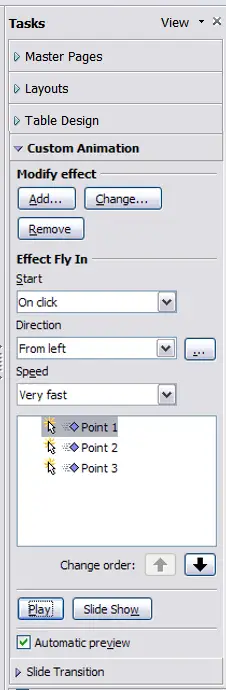
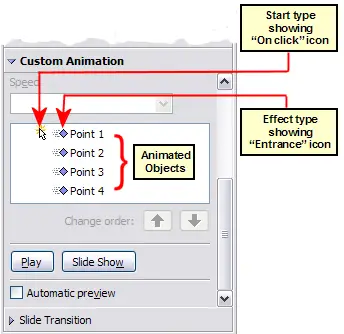
Task pane, showing Custom Animation page.
Click Add. The Custom Animation dialog appears. Choose an effect from one of the pages of this dialog, and choose the speed or duration of that effect. See
this example for some hints on how to combine multiple effects.
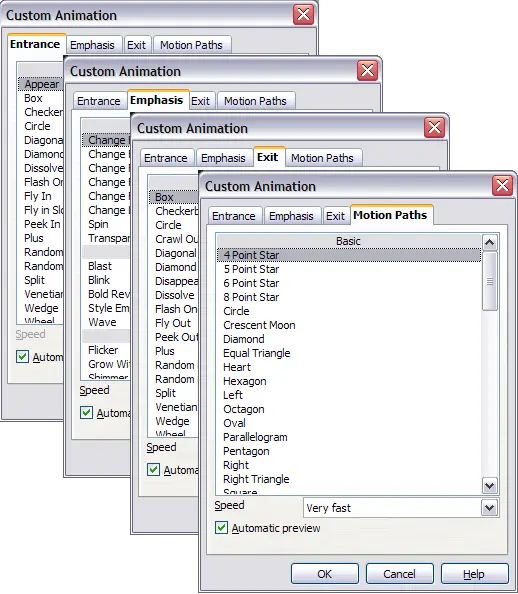
Custom Animation dialog. Choices may vary depending on the selected object; for example, pictures and text have different Emphasis choices.
To choose the animation to be applied when the object is placed on the screen, use an effect from the Entrance page, for example Fly In or Dissolve In.
Use the Emphasis page to apply an effect that changes the font color or applies special effects to the text such as blinking text.
To choose the effect to be applied when the object is leaving the page, use the Exit page.
If you want the object to move along a line or curve, select an animation from the Motion Paths page. An example of this type of animation
is provided here.
Click OK to save the effect and return to the Custom Animation page on the Task pane. Here you can choose how to start the animation, change the speed, and some additional properties of the selected effect.
Starting an animation effect
You have three choices for starting an animation effect:
On click—the animation stops at this effect until the next mouse click.
With previous—the animation runs at the same time as the previous animation.
After previous—the animation runs as soon as the previous animation ends.
Choosing additional properties of an animation effect
Many animations have properties that you can set or change. For example, if you chose the Change Font Color effect on the Emphasis page, you can specify the font color. If you chose Fly In on the Entrance page, you can specify the direction from which the object flies in.
The label on the properties box changes depending on the choices available for each effect. For example, a Fly In effect has a box labelled Direction and a Change Font Color effect has a box labelled Font color.
Example: Using multiple animation effects
To illustrate how you can set up multiple effects, let’s look at a common animation: list items fly in one at a time from the bottom of the slide, and as each new item appears, the previous items change to a different color. Here is how to create these effects.
Step 1. Apply the “fly in” effect to individual list items.
- Display the Custom Animation page of the Task pane.
- Create a slide with several items in a bullet list. Our example slide has four.
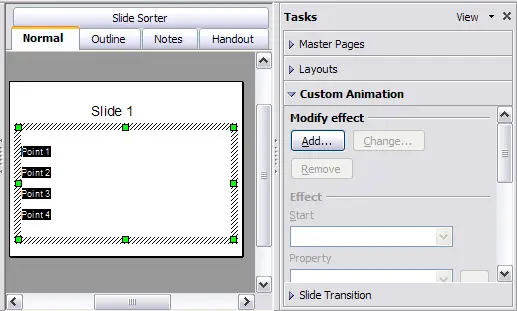
Example slide for multiple animations.
- Select all four items. Click Add on the Custom Animation pane.
- On the Entrance page of the Custom Animation dialog, select Fly In, optionally change the Speed to Medium, and click OK.
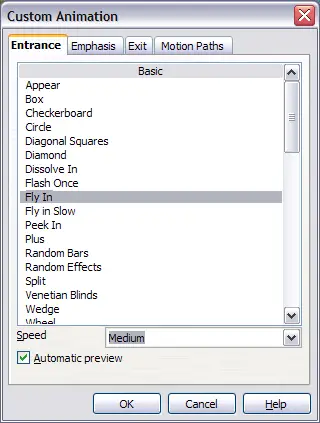
Choosing an entrance effect.
- The four effects you have just set up are listed in the animations list on the Custom Animation page, as shown below.
Animation list, showing four items.
Step 2. Apply the “change font color” effect to some list items.
Now we want to set each of the first three list items to change color when the following item appears on the slide. To do this:
- Select the first three items on the slide (not the animations list) and click Add in the Custom Animation pane. This time we go to the Emphasis page of the Custom Animation dialog and choose Change Font Color, as shown below. Click OK to save this effect.
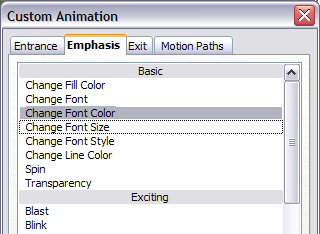
Choosing an emphasis effect.
- Notice that the three new animations are listed at the bottom of the animations list, and the “type of effect” icon for these three effects (in the second column) is different from the icon for the first four effects.
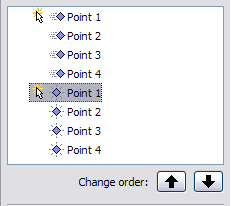
Animation list after adding a second set of animations.
- You could, if you wish, select any of the last three items and choose a different color from the Font color list on the Custom Animation pane.
- Use the Change order: up-arrow button to move each of the last three items up the list to just under the other item with the same name. The animation list will now look like the figure below.
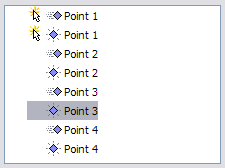
Animation list after moving items into required sequence.
Step 3. Change the timing for some list items from With previous to On click.
Notice that all of the items on the animations list (except for the two “Point one” items) are set to start at the same time as the previous item. However, we want the second “Point two” animation and the second “Point three” animation to also occur On click.
- Select these items, and then choose On click from the Start list. The animation list now looks like the figure below.
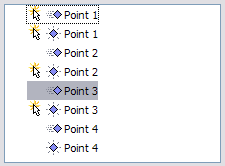
Final list of animations.
- Save the file.
- Test this set of animations by clicking the Slide Show button.
Example: Setting up a motion path
The Motion path effect moves an object along a path consisting of a combination of straight and curved lines. Several pre-packaged paths are provided in OOo, but it is not difficult to create your own custom path. Start by selecting the object you want to animate and select a pre-packaged motion path animation which is similar to the effect you want to obtain. Alternatively use the Polygon or Curve animation to create a new path.
Select the object to show the animation path, which will be displayed as a thin gray line with a triangle showing the starting point and another indicating the end point. Click on any point on the line so that blue handles are displayed around it. When the blue handles around the path are shown, you can move or resize the path in the same way as you would perform these operations on a graphic object.
 | When moving a path, remember to move also the object on that path, otherwise the animation will start with a jump. Currently it is not allowed to rotate a path.
|
If instead you want to modify the individual points on the line, select the Points tool
 from the Drawing toolbar while the path is selected. The Edit Points toolbar should be displayed; if not, select it from View > Toolbars > Edit Points.
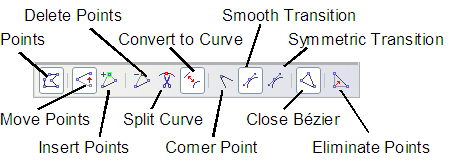
The Edit Points toolbar
Once a point is selected, you can add an additional point, delete it, move it and so on. For a detailed explanation on how to manipulate the points on a curve, see the Draw Guide. Once you are satisfied with the shape of the curve and its speed, click anywhere on the screen to deselect the object and continue normal editing.
The figure below shows a polygon motion path with a curved section.
You can combine a motion with other effects such as spinning or changing of size or colors to obtain dramatic effects.
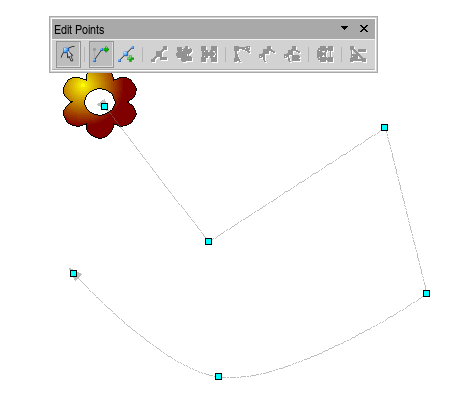
Object set to move along a polygon and curve path


