Diskettes are one of the oldest removable media solutions available
for the personal computer (PC). Diskettes are ideal as a portable
storage solution for small files that need to be physically moved
around. For example, if two PCs are not on the same network, diskettes
are a great solution to transfer files from one computer to the
other.
4.1.1. Mounting and Unmounting a Diskette
A diskette must first be mounted before it can be used. To mount a
diskette, insert it into the diskette drive and type mount
/mnt/floppy/ at a shell prompt.
The diskette drive activity light should blink as the diskette's
file system is mounted to the /mnt/floppy
directory.
You can access the contents of the diskette by changing into
that directory with the cd /mnt/floppy/ command.
Alternatively, you can also mount a diskette by right-clicking
on the desktop and choosing Disks =>
Floppy. This mounts the diskette and adds a
desktop icon which you can double-click to explore the diskette
contents.
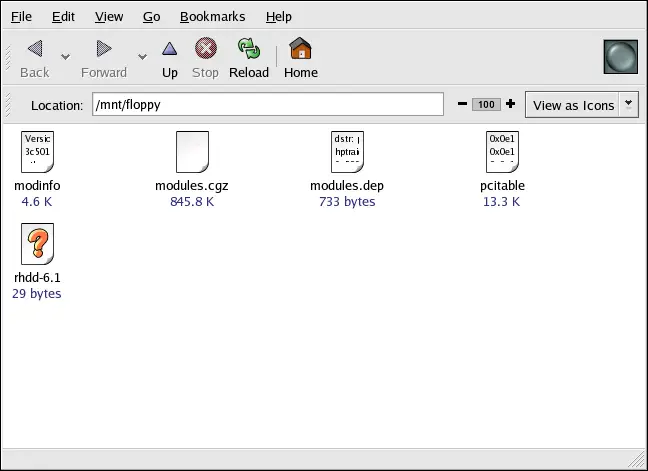
Now that the diskette has been mounted it is available to be
copied from or written to. You can open, save, and copy files to/from
it as you would normally do to your hard drive. You can even explore
the diskette's contents in Nautilus (as
shown in Figure 4-1) or
Konqueror.
When you are done using the diskette, you should unmount it before
ejecting it from the drive. To do this, close any applications that
may be using files on the diskette or exploring the diskette's
contents (such as Nautilus or
Konqueror), and at a shell prompt type the
following command :
If you are using GNOME, you can unmount the diskette by
right-clicking on the  icon and choosing Unmount
Volume from the menu.
icon and choosing Unmount
Volume from the menu.
You can now safely eject the diskette from the drive.
4.1.2. Putting Linux Files on an MS-DOS Diskette
To copy files from a Linux machine to an MS-DOS formatted diskette
so that a Windows machine can read it you should format your diskette with
an MS-DOS (FAT) file system. This can be done with the Windows OS or
with gfloppy (see Section 4.1.3.1 Using gfloppy). Then mount it in Linux as
described in Section 4.1.1 Mounting and Unmounting a Diskette. Copy files
using the following command (substituting
filename with the name of the file you wish
to copy):
You can then unmount the diskette and eject it from the drive. The
new file on the diskette should now be accessible from your Windows
machine.
4.1.3. Formatting a Diskette
To use a diskette specifically with Red Hat Linux, you need to format the
diskette using the ext2 file system. ext2 is one of the file systems
supported by Red Hat Linux, and is the default method used for formatting
diskettes.
 | Warning |
|---|
| | Formatting a diskette will erase all of its contents. Be sure to
backup any files that you need before performing any of the
following operations on your diskettes.
|
Once you have created an ext2 file system on the diskette, you can
manipulate its contents in the same ways that you manipulate
directories and files on your hard drive.
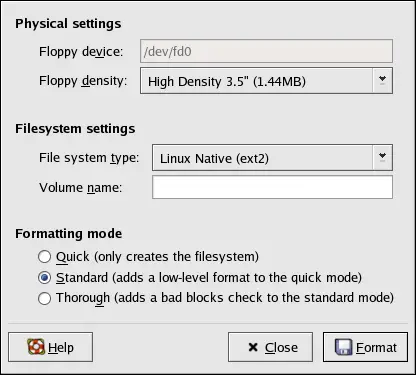
4.1.3.1. Using gfloppy
To start gfloppy, choose
=> =>
. From a shell prompt, type
/usr/bin/gfloppy. As shown in Figure 4-2, the gfloppy
interface is small and has few options. The default settings are
sufficient for most users and needs; however, you can format your
diskette with an MS-DOS file system type if necessary. You can also
choose the density of your diskette (if you are not using the
usual high density 3.5" 1.44MB diskette). You can also elect to
quick format the diskette if it was
previously formatted as ext2.
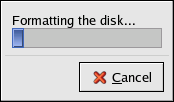
Insert a diskette and change the settings in
gfloppy to suit your needs; then click
Format. The status box will appear on top of
the main window, showing you the status of formatting and
verification (see Figure 4-3). Once
complete, you can eject the diskette and close
gfloppy.
4.1.3.2. Using mke2fs
The mke2fs command is used to create a Linux
ext2 file system on a device such as a hard drive partition or (in
this case) a diskette. mke2fs essentially formats
the device and creates an empty, Linux-compatible device which can
then be used for storing files and data.
Insert your diskette into the drive and issue the following command
at a shell prompt:
On Linux systems, /dev/fd0 refers to the
first diskette drive. If your computer has more than one diskette
drive, your primary diskette drive is
/dev/fd0, your second
/dev/fd1, and so on.
The mke2fs utility has a number of
options. The -c option makes the
mke2fs command check the device for bad blocks
before creating the file system. The other options are covered in
the mke2fs man page.
Once you have created an ext2 file system on the diskette, it is ready to
be used with your Red Hat Linux system.