The Perspective Tool is used to change the perspective of the active
layer content, of the selection boundaries or of a path. When you click
on the image, according to the Preview type you have selected, a
rectangular frame or a grid pops up around the selection (or around the
whole layer if there is no selection), with a handle on each of the four
corners. By moving these handles by click-and-drag, you can modify the
perspective. At the same time, a “Transformation informations
” pop up, which lets you valid the transformation. At the center
of the element, a point lets you move the element by click-and-drag.
4.7.1. Activate Tool
The Perspective Tool can be called in the following
order, from the image-menu:
Tools/
Transform
Tools/Perspective
.
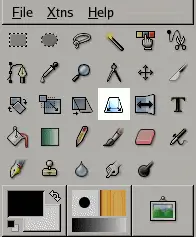
The Tool can also be called by clicking the tool icon:
4.7.2. Key modifiers (Defaults)
Shortcut
The
Shift-p
key combination will change the active tool to
Perspective.
4.7.3. Options
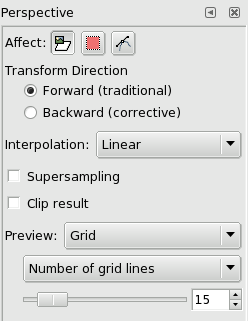
Figure 8.56.
“Perspective” tool options
Overview
The available tool options for the Perspective Tool can be
accessed by double clicking the Perspective Tool icon.
Affect
Affect icons let you choose the element, current layer,
selection or path, the tool will transform:
The Transform layer lets you
modify the perspective of the selection
content (the whole layer if there is
no selection.
The Transform selection lets you
modify the perspective of the selection
boundaries.
The Transform path lets you
modify the perspective of the current path.
Warning
Remember that your Affect choice persists after quitting the
tool.
Transform Direction
Forward (Traditional): Performs
transformation according to the direction of grid lines: if
grid is bent 10° to the left then the image will be bent 10°
to the left too.
Backward (Corrective): Performs
transformation in the reverse direction of grid lines: if
grid is bent 10° to the left then the image will be bent
10° to the right and so will be set upright. This option is
used to correct perspective deformations. You bend grid
lines to align them on the image lines that you want
straighten up then you click Transform in the Info Window.
You can have to clip the image after this transformation.
Interpolation
The Interpolation drop-down list allows
you to choose the quality of the transformation. For more
information about the different methods that can be
employed, see the glossary entry
Interpolation.
Clip Result
This option will clip the transformated image to the original
image size.
Preview
Here, Preview is superimposed on the image. The
drop-down list gives you four possibilities:
Outline: Puts a frame to mark
the image outline, with a handle on each corner.
Movements will affect this frame only on the Preview, but
the result of the transformation will concern either the
content or the boundaries of the selection according to
the selected Affect mode.
Grid: Puts a grid on the image,
with four handles. Movements will affect this grid
only on the Preview, but the result of the transformation
will concern either the content or the boundaries of the
selection according to the selected Affect mode.
Image: Here, the preview is a
copy of the image superimposed on the image, with an
outline. Movements affect this copy and the
underlying image appears.
Grid+Image: Both turn at the
same time.
Preview type is only for greater convenience. Whatever your
choice, result will be the same when you clic on the
Transform button in the Perspective
Transform Information dialog
Options with grid activate a drop-list with two options:
Number of Grid Lines will allow control
over the total number of displayed grid lines. Use the
slider to set the number of grid lines.
Grid Line Spacing allows control over
the distance between the grid lines. Use the slider to set
the distance.
Note
When transforming a path, Preview options are not valid:
only Outline is active.
When you click on the image with the Perpective tool to
transform a path, the path disappear from the image but
re-appears as soon as you move a handle.
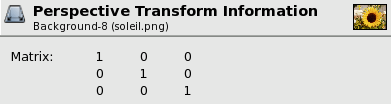
The Information window for perspective transformation
Figure 8.57.
The dialog window of the “Perspective” tool
Matrix
You can get a small knowledge about matrices in the
Convolution Matrix
plug-in.
Published under the terms of the GNU General Public License


![[Warning]](../images/warning.png)
![[Note]](../images/note.png)