The Eraser is used to remove areas of color from the current layer or
from a selection of this layer. If the Eraser is used on something that
does not support transparency (a selection mask channel, a layer mask,
or the Background layer if it lacks an alpha channel), then
erasing will show the background color, as displayed in the Color
Area of the Toolbox (in case of a mask, the selection will be modified).
Otherwise, erasing will produce either partial or full transparency,
depending on the settings for the tool options.
If you need to erase some group of pixels completely, leaving no
trace behind of their previous contents, you should check the
"Hard edge" box in the Tool Options. Otherwise, sub-pixel brush
placement will cause partial erasure at the edges of the
brush-stroke, even if you use a hard-edged brush.
Tip
If you use GIMP with a tablet, you may find it convenient to
treat the reverse end of the stylus as an eraser. To make this
work, all you need to do is click the reverse end on the Eraser tool
in the Toolbox. Because each end of the stylus is treated as a
separate input device, and each input device has its own
separate tool assignment, the reverse end will then continue to
function as an Eraser as long as you don't select a different
tool with it.
3.7.1. How to Activate
The Eraser can be activated from an image menu as
Tools->Paint Tools->Eraser;
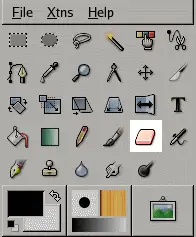
from the Toolbox by clicking on the tool icon
;
or from the keyboard using the shortcut E.
3.7.2. Key modifiers
See the Brush Tools
Overview for a description of key modifiers that have the
same effect on all brush tools.
Ctrl:
For the Eraser, holding down the Ctrl key puts it into
“color picker” mode, so that it selects the color of
any pixel it is clicked on. Unlike other brush tools, however,
the Eraser sets the background color rather
than the foreground color. This is more useful, because on
drawables that don't support transparency, erasing replaces the
erased areas with the current background color.
Alt:
For the Eraser, holding down the Alt key switches it into
“anti-erase” mode, as described below in the Tool
Options section. Note that on some systems, the Alt key is trapped
by the Window Manager. If this happens to you, you may be
able to use Shift-Alt instead.
3.7.3. Tool Options
Note
See the Brush Tools
Overview for a description of tool options that apply to
many or all brush tools.
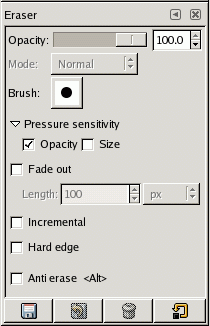
Figure 8.28.
Tool Options for the Eraser tool
See the Brush Tools
Overview for a description of tool options that apply to
many or all brush tools. The Eraser tool has only one special
option (Anti-Erase), but the Opacity control is mentioned here
as well because its name may be a bit confusing.
Opacity
The "Opacity" slider, in spite of its name, determines the
"strength" of the tool. Thus, when you erase on a layer
with an alpha channel, the higher the "opacity" you use, the
more transparency you get!
Anti Erase
The Anti Erase option of the Erase tool can
un-erase areas of an image, even if they are completely
transparent. This feature only works when used on
layers with an alpha channel. In addition to the
checkbutton in the Tool Options, it can also be activated
on-the-fly by holding down the Alt key (or, if the Alt key
is trapped by the Window Manager, by holding down both Shift
and Alt).
Note
To understand how anti-erasing is possible, you should
realize that erasing (or cutting, for that matter) only
affects the alpha channel, not the RGB channels that contain
the image data. Even if the result is completely
transparent, the RGB data is still there, you simply can't
see it. Anti-erasing increases the alpha value so that you
can see the RGB data once again.
An annoying feature: on a layer you have created with a
transparent background, using anti-erasing on non-painted areas
paints with black!
Published under the terms of the GNU General Public License


![[Tip]](../images/tip.png)

![[Note]](../images/note.png)