Follow Techotopia on Twitter

On-line Guides
All Guides
eBook Store
iOS / Android
Linux for Beginners
Office Productivity
Linux Installation
Linux Security
Linux Utilities
Linux Virtualization
Linux Kernel
System/Network Admin
Programming
Scripting Languages
Development Tools
Web Development
GUI Toolkits/Desktop
Databases
Mail Systems
openSolaris
Eclipse Documentation
Techotopia.com
Virtuatopia.com
Answertopia.com

How To Guides
Virtualization
General System Admin
Linux Security
Linux Filesystems
Web Servers
Graphics & Desktop
PC Hardware
Windows
Problem Solutions
Privacy Policy


16.18.  Neon

16.18.1.  Overview

Figure 16.374.  Example for the “Neon” filter

Example for the Neon filter

Neon” applied


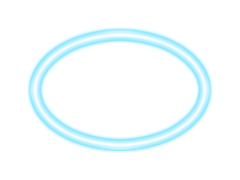
This filter converts the active layer's alpha into a neon-sign like object and optionally adds a shadow.

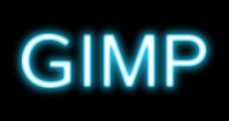
It is derived from the “Neon” Script-Fu script (FileCreateLogosNeon in the image window), which creates a text effect that simulates neon lighting:

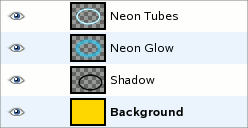
The filter uses two layers to achieve the neon effect:

Figure 16.375.  The Neon effect

The Neon effect

The “Neon Tubes” layer

The Neon effect

The “Neon Glow” layer


The layer “Neon Tubes” is the active layer the filter is applied to. The content of this layer doesn't matter. Only the alpha channel does, especially its shape.

[Warning] Warning

The image will always be resized to the active layer's size.

The “Neon Glow” layer below contains the glowing of the neon light.

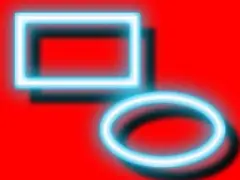
Optional a “Shadow” layer is created below, containing a drop shadow in the same shape of the active layer's alpha channel. At the bottom a new “Background” layer is created filled with the Background color.

Overview of the Neon filter layers:

16.18.2.  Activate the filter

You can find this filter in the image window menu under FiltersAlpha to LogoNeon.

16.18.3.  Options

Figure 16.376.  Neon” options

Neon options

Effect size (pixels * 5)

This is actually the font size option of the Neon Script-Fu script. Some internal values will be set in relation to this font size, for instance tube size, shadow offset, and blur radius. So it may be a good idea to select the height of your objects as a starting point here. (“pixels * 5” is nonsense, ignore it.)

Background color

This is the color used to fill the “Background” layer; it defaults to black. When you click on the color swatch button, you can choose any other color in the color selector dialog.

Glow color

This is the color of the glowing neon tubes. The default is a typical neon-like light blue (38,211,255). Again, a click on the color swatch button brings up the color selector.

Create shadow

Optionally, the filter can create a drop shadow, which will have the same shape as the alpha channel. The shadow color is black, and cannot be modified. Unless you don't plan to remove the background layer, you should select a different Background color.

Neon” with shadow


  Published under the terms of the GNU General Public License Design by Interspire