This filter gives the impression that sun hit the objective when taking
a shot. You can locate the reflection with a reticule you can move, but
you have not the possibilities that the
Gradient Flare filter offers.
5.3.2.
Activate the filter
You can find this filter in the image menu menu through
Filters → Light and Shadow → Lens Flare.
5.3.3.
Options
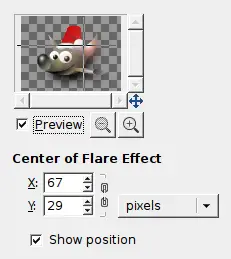
Figure 16.97.
“Lens Flare” filter options
Preview
Parameter setting results are interactively displayed in preview.
Scroll bars allow you to move around the image.
Center of Flare Effect
You can set there X and Y (pixels) coordinates of glint. The
coordinate origin is at upper left corner.
Show position
When this option is checked, a reticule appears in preview and you
can move it with the mouse pointer to locate the center of Lens
Flare effect.
Tip
The mouse cursor, which looks like a cross when it moves over
the preview, lets you locate the filter effect even without the
reticule.
Published under the terms of the GNU General Public License


![[Tip]](images/tip.png)

