This menu item replaces the “Acquire” menu which
existed in GIMP previous versions in the Toolbox
Menu and contains a lot of logos, buttons, patterns...
These commands vary somewhat, depending upon your system, since
the GIMP makes calls to system functions.
2.3.1. Activate the Submenu
When you copy a selection, it goes into the clipboard. Then you can
create a new image with it.
This command has the same action as the
Paste as new command.
The Print Screen keyboard key captures the screen and
puts it in the clipboard. This command has the same action as
“taking a screenshot of the entire screen” in the
Screenshot dialog window. The
Alt+Print Screen key combination grabs the active window in the screen
with its decorations and puts it in the clipboard.
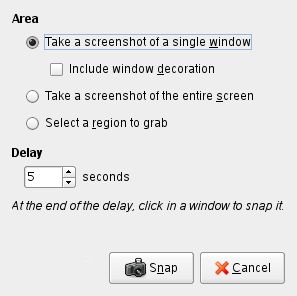
The command opens a
dialog with two parts:
-
Area
-
-
Take a screenshot of a single window
-
The mouse pointer becomes a cross. Click in the image window
you want to capture. A new image is created. If the
Include window decoration option is
unchecked, the title bar and the blue frame around the image
will be removed.
-
Take a screenshot of the entire screen
-
This is useful if you want to capture a pop menu. A delay is
then necessary, so that you have time to pull the pop menu
down.
If the Include mouse pointer option is
checked, then the mouse pointer and its coming with icon are
also captured. The mouse pointer is captured in a separate
layer. So you can move it to another place in the image.
-
Select a region to grab
-
The mouse pointer becomes a cross. Click and drag to create
a rectangular selection in the image window. This selection
will be opened as a new image. Its size is adapted to the
selection size.
-
Delay
-
When taking a screenshot of the entire screen, the screen is
captured after this delay. In the other cases, the mouse pointer
turns to a cross after this delay.
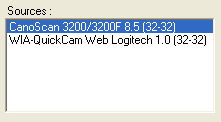
2.3.4. Image capture devices
This item is present only if you have installed image capture
devices.
The kinds of devices used to take pictures are too varied to be
described here. Fortunately, their use is fairly intuitive. In the
example shown, you can start a scanner or take an image with a
webcam.
2.3.5. Buttons, Logos, Patterns, Web Page Themes
An impressive list of script-fus. Have a look at it!