Follow Techotopia on Twitter

On-line Guides
All Guides
eBook Store
iOS / Android
Linux for Beginners
Office Productivity
Linux Installation
Linux Security
Linux Utilities
Linux Virtualization
Linux Kernel
System/Network Admin
Programming
Scripting Languages
Development Tools
Web Development
GUI Toolkits/Desktop
Databases
Mail Systems
openSolaris
Eclipse Documentation
Techotopia.com
Virtuatopia.com
Answertopia.com

How To Guides
Virtualization
General System Admin
Linux Security
Linux Filesystems
Web Servers
Graphics & Desktop
PC Hardware
Windows
Problem Solutions
Privacy Policy


Eclipse Workbench User Guide
Previous Page Home Next Page

Checking out a project

Coworker Fred has several tasks in front of him: 

  • Fred will import the project that Jane committed to the CVS repository into his Workbench.
  • Fred will make changes to file1.txt and file2.txt.
  • Fred will synchronize and commit his outgoing changes to the two files.

Fred's first step is to import the project into his workspace as follows:

  1. Run the import wizard via the File > Import menu item. Screenshot of Import type selection
  2. Select the Projects from CVS item and press Next.
  3. Create a repository location as described when Jane created a repository.
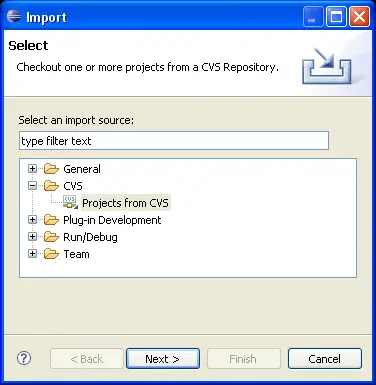
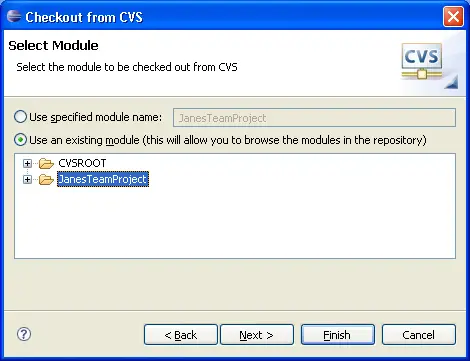
  4. On the next page select the "Use an existing module" radio button and wait while the repository is contacted. Screenshot of CVS module selection page
  5. From the list of available projects, select JanesTeamProject 
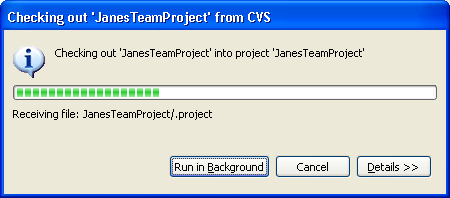
and press Finish. A progress dialog will appear showing the progress of the import operation.
    Screenshot of progress dialog
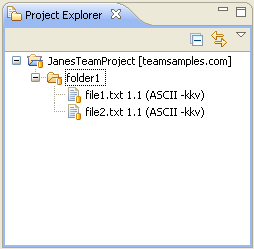
  6. Open one of the navigation views and observe that it now includes the project JanesTeamProject. Notice that there are CVS decorators indicating the file revisions, the repository name, and the file types. Screenshot of Fred's Project Explorer after checkout


  Published under the terms of the Eclipse Public License Version 1.0 ("EPL") Design by Interspire