|
 |
|
| |
Exporting files
Files can be exported from the Workbench either by:
- Dragging and dropping to the file system (Windows and Linux GTK only), or
-
 Copying and pasting to the file system, or
- Using the
 Export wizard
.
Export wizard
.
Drag and drop or copy and paste
The operating system's file system explorer can be used to export a copy of
a folder or file from the Workbench to the file system.
-
Open the operating system's file system explorer.
-
Drag the file JanesFile.txt from one of the navigation view
to the file system explorer.
-
Depending on where you are dragging to, you may need to hold
down the Ctrl or Shift key while dragging to ensure the file is copied.
Look for a small plus sign on the drag cursor to know whether the file is
being copied or moved.
-
The export can also be achieved by selecting the file in
the Project Explorer and choosing Edit > Copy, then
pasting it in the file system explorer.
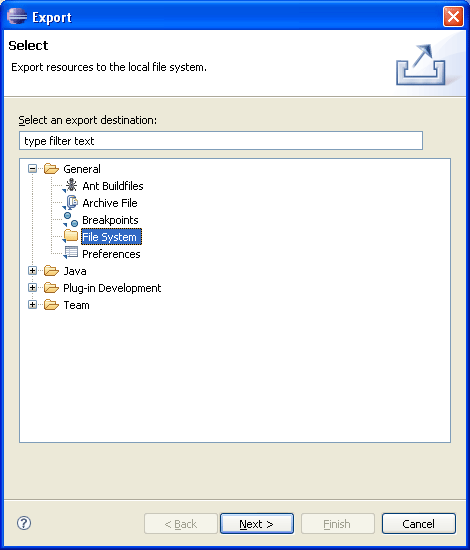
Export wizard
The Export wizard can be used to export from the Workbench to
the file system.
-
Select the project JaneQuser in the navigation view.
-
From the popup menu, select Export.
-
In the Export wizard, select File system, then click
Next.
-
Expand JaneQuser project, and click on JanesFolder. In the
right pane ensure that only JanesINIFile.ini is selected. Notice the
folder and project in the left pane now have a grayed checkbox indicating
that some, but not all, of their contents will be exported.
The Select Types button can be used to filter the types
of resources to export.
Note: To export JanesINIFile.ini only, simply
select it in the navigation view and choose File > Export. The
Export wizard will automatically ensure it is the only file selected for
export.
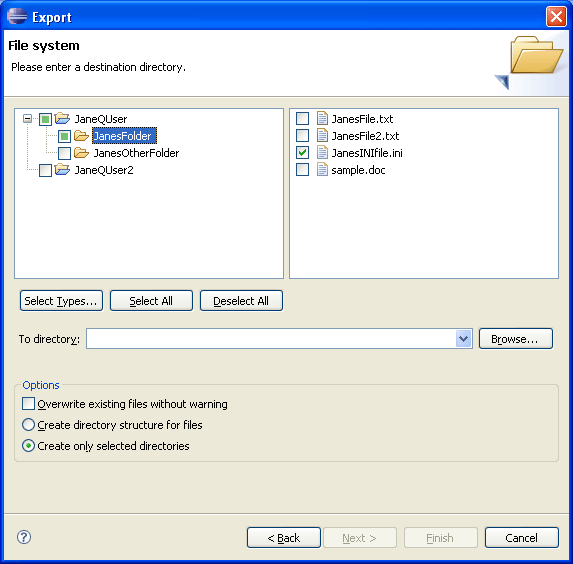
-
In the To directory field, type or browse to select
a location in the file system for the exported resources to reside.
If the name of a directory that does not exist is entered
the Export wizard will offer to create it once Finish is selected.
-
In the Options area, options are given to:
- Overwrite existing resources without warning
- Create directory structure for files or Create only selected
directories
-
Click Finish when done.
|
|
|


