Plug-in Import
 File > Import... > Plug-in Development > Plug-ins
from the top level menu.
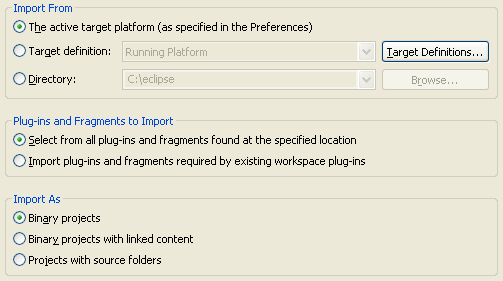
Import Location
The plug-ins can be imported from one of three locations.
-
The active target platform (as specified in the Preferences):
Window > Preferences... > Plug-in Development > Target Platform
preference page.
-
Target definition:
You can select this option to import plug-ins from a different target definition. Use the drop-down box to select the target definition of choice.
The Target Definitions... button is a shortcut that opens the Target Platform preference page for inspection or modification.
-
Directory:
Select this option if you choose to import plug-ins from an arbitrary location on the file system and you do not wish to change the location of the target platform in the preferences. Then, use the Browse... button to navigate and enter the directory of choice.
Plug-ins and Fragments to Import
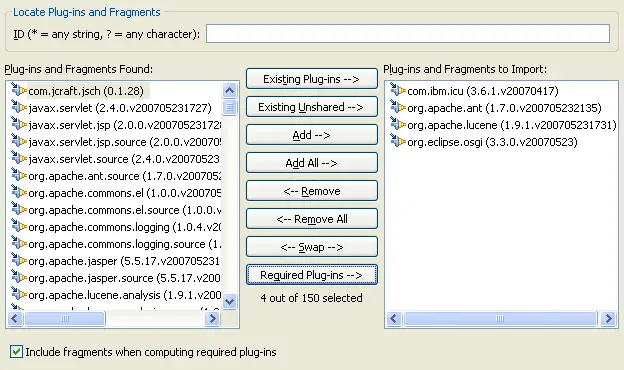
The Select from all plug-ins and fragments found at the specified location option takes you to a second wizard page that lets you browse all plug-ins and choose a subset to import.
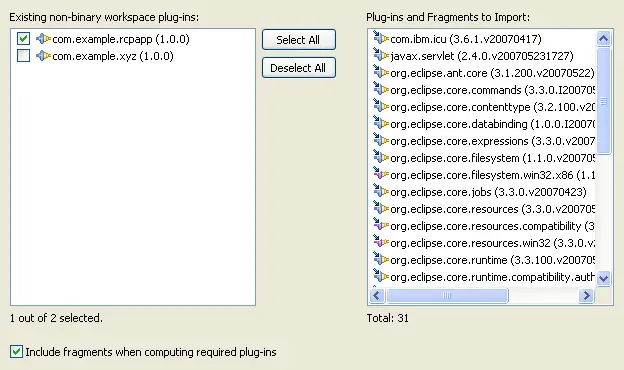
The Import plug-ins and fragments required by existing workspace plug-ins option is useful when you are importing all pre-requisites for a plug-in that is not part of the target platform. This option takes you to a second wizard page that is simpler; but, provides less overall control over what gets imported.
Import Format
When plug-ins are imported, a project is created in the workspace for each plug-in. The project has the same name as the ID of the plug-in being imported.
As for the content of each project, it varies by import format:
-
Binary projects: The plug-in content is copied into the project. The binary code remains intact in a JAR; while, the manifest files and other resources are extracted to the project root. The advantage of binary projects is that they allow you to browse the code without the overhead of compiling the source code.
-
Binary projects with linked content: The plug-in content is not copied into the project. Instead, links are created in the project to map to the actual physical location of the JARs, files and folders on disk. The advantage of this type of import over a regular binary import is that it is faster to import; since, the operation only involves creating links. The disadvantage of this approach is that linked binary projects can become out of sync and have to be re-imported if the absolute path to these linked files are changed in the file system.
-
Projects with source folders: The source code for the plug-ins being imported gets extracted and placed in source folders. The advantage of this type of import is that you will be able to modify the imported source code. The disadvantage of this approach is that the code gets compiled and results in an overhead whose magnitude is proportional to the number and size of plug-ins imported.


