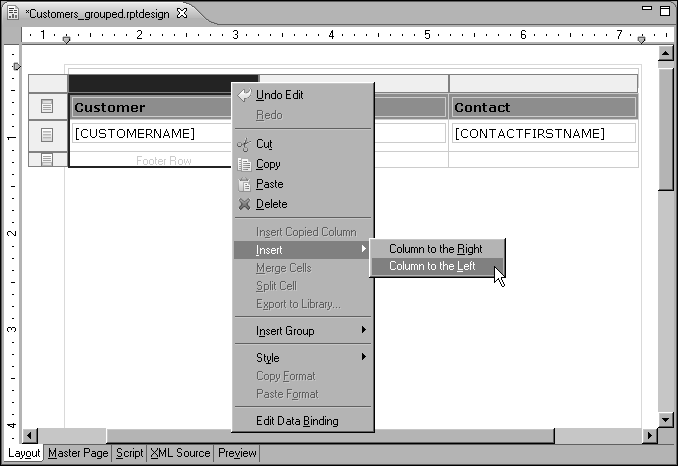
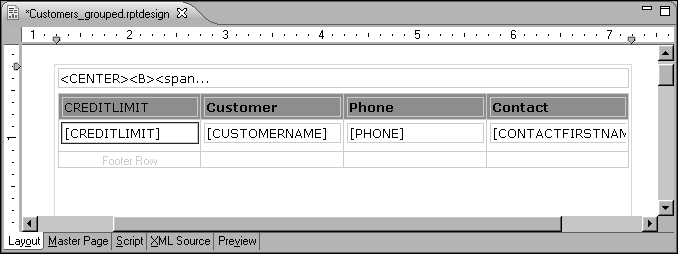
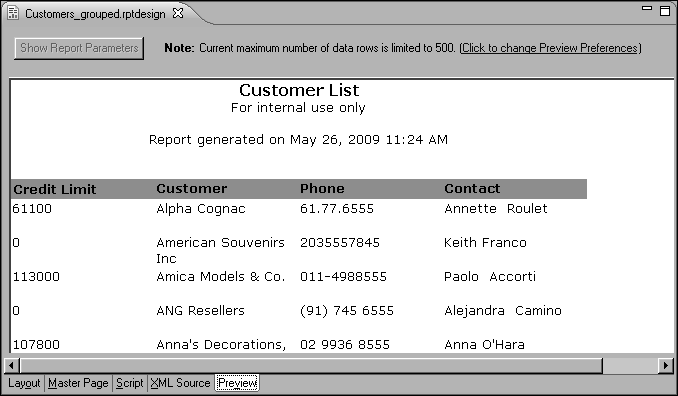
Task 4: Add credit limit data to the report In this procedure, you insert the credit limit field in the existing table. 1 In the layout editor, select the table. Guide cells appear at the top and left side of the table. 2 Right-click the guide cell above the first column, then choose Insert→Column to the Left, as shown in Figure 8‑3. Figure 8‑3 Inserting a column to the left of an existing column A new column appears. 3 In Data Explorer, expand Data Sets, then expand Customers. The Customers data set displays the fields specified in the query. 4 Drag the CREDITLIMIT field from Data Explorer, and drop it in the detail row cell next to [CUSTOMERNAME]. In the layout editor, the table displays the field that you added. The table also shows the label element that the layout editor automatically added to the header row. This label serves as the column heading and displays the field name as static text. The report should look like the one shown in Figure 8‑4. Figure 8‑4 Result of adding the credit limit field in the layout editor 5 Edit the CREDITLIMIT label so that it displays Credit Limit. 6 Format the Credit Limit label to look like the other labels in the table header. 1 Right-click the Customer label, and select Copy Format. 1 Right-click the Credit Limit label, and select Paste Format. 7 Preview the report. The report should look like the one shown in Figure 8‑5. Figure 8‑5 Report preview showing the result of adding credit limit Some of the customers have a credit limit of 0. These are new customers who have not yet been approved for a line of credit.
In this procedure, you insert the credit limit field in the existing table.