-
To start
virt-manager
execute the following as root in your shell:
$ sudo virt-manager &
The virt-manager command opens a graphical user interface window. Various functions are not available to users without root privileges or sudo configured, including the
New
button and you will not be able to create a new virtual machine.
-
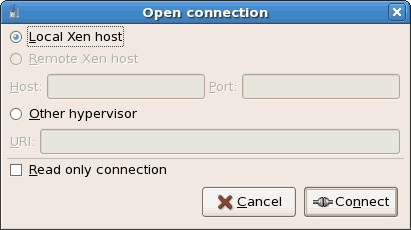
The Open Connection dialog box appears. Click the
Connect
button and the main
virt-manager
window appears:
-
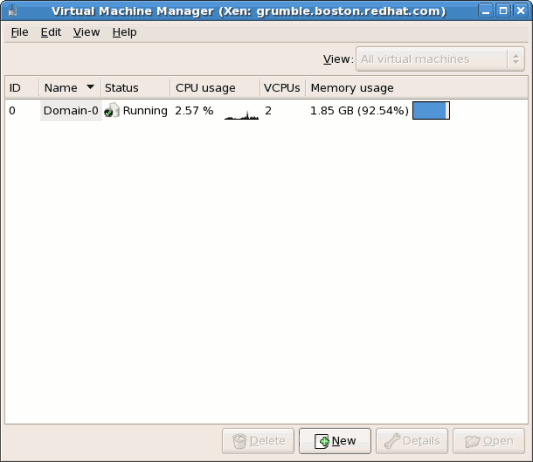
The
virt-manager
window allows you to create a new virtual machine. Click the
New
button to create a new guest. This opens the wizard shown in the screenshot.
-
The
Create a new virtual system
window provides a summary of the information you must provide in order to create a virtual machine:
Review the information for your installation and click the
Forward
button.
-
The
Choosing a virtualization method
window appears. Choose between
Para-virtualized
or
Fully virtualized
.
Full virtualization requires a system with Intel® VT or AMD-V processor. If the virtualization extensions are not present the
fully virtualized
radio button or the
Enable kernel/hardware acceleration
will not be selectable. The
Para-virtualized
option will be grayed out if kernel-xen is not the kernel running presently.
Choose the virtualization type and click the
Next
button.
-
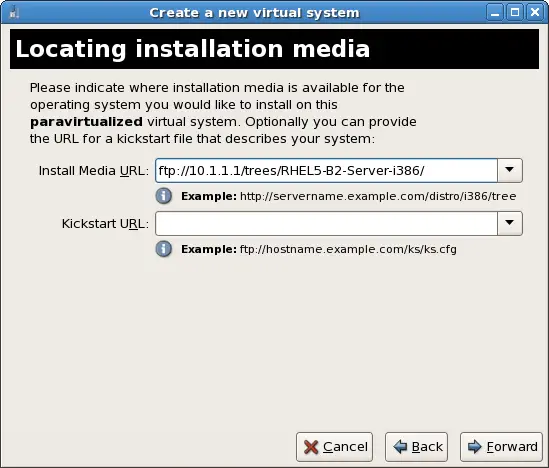
The
Locating installation media
prompt asks for the installation media for the type of installation you selected. This screen is dependent on what was selected in the previous step.
-
The para-virtualized installation requires an installation tree accessible using one of the following network protocols: HTTP, FTP or NFS. The installation media URL must contain a Red Hat Enterprise Linux installation tree. This tree is hosted using NFS, FTP or HTTP. The network services and files can be hosted using network services on the host or another mirror.
Using a CD-ROM or DVD image(an .iso file), mount the CD-ROM image and host the mounted files with one of the mentioned protocols.
Alternatively, copy the installation tree from a Red Hat Enterprise Linux mirror.
-
A fully virtualized guest installation require bootable installation DVDs, CD-ROMs or images of bootable installation DVDs or CD-ROMs(as .iso or .img files) locally. Windows installations use DVD, CD-ROM or .iso file. Many Linux and unix-like operating systems use an .iso file to install a base system before finishing the installation with a network based installation tree.
After selecting the appropriate installation media, click the
Forward
button.
-
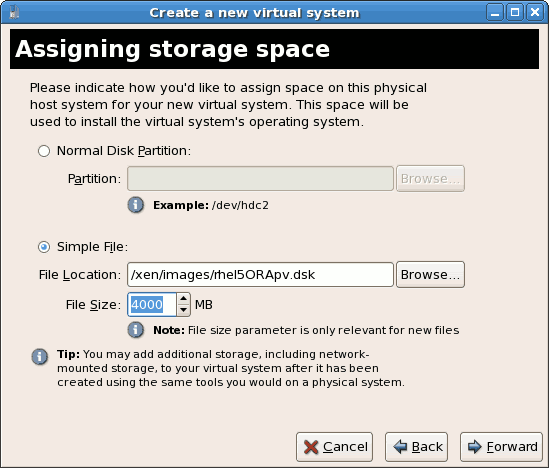
The
Assigning storage space
window displays. Choose a disk partition, LUN or create a file based image for the guest storage.
The convention for file based images in Red Hat Enterprise Linux 5 all file based guest images are in the
/var/lib/xen/images/ directory. Other directory locations for file based images are prohibited by SELinux. If you run SELinux in enforcing mode, refer to
Section 10.1, “SELinux and virtualization” for more information on installing guests.
Your guest storage image should be larger than the size of the installation, any additional packages and applications, and the size of the guests swap file. The installation process will choose the size of the guest's swap file based on size of the RAM allocated to the guest.
Allocate extra space if the guest needs additional space for applications or other data. For example, web servers require additional space for log files.
Choose the appropriate size for the guest on your selected storage type and click the
Forward
button.
Note
It is recommend that you use the default directory for virtual machine images, /var/lib/xen/images/. If you are using a different location (such as /xen/images/ in this example) make sure it is added to your SELinux policy and relabeled before you continue with the installation (later in the document you will find information on how to modify your SELinux policy)
-
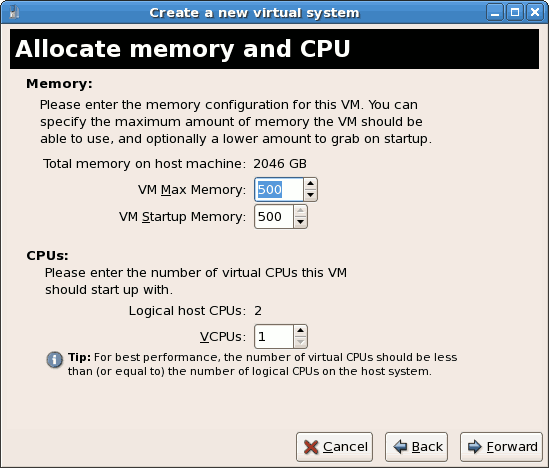
The Allocate memory and CPU window displays. Choose appropriate values for the virtualized CPUs and RAM allocation. These values affect the host's and guest's performance.
Guests require sufficient physical memory(RAM) to run efficiently and effectively. Choose a memory value which suits your guest operating system and application requirements. Most operating system require at least 512MB of RAM to work responsively. Remember, guests use physical RAM. Running too many guests or leaving insufficient memory for the host system results in significant usage of virtual memory. Virtual memory is significantly slower causing degraded system performance and responsiveness. Ensure to allocate sufficient memory for all guests and the host to operate effectively.
Assign enough virtual CPUs for the guest you are virtualizing. If the guest runs a multithreaded application assign the number of virtualized CPUs it requires to run most efficiently. Do not assign more virtual CPUs than there are physical processors(or hyper-threads) available on the host system. It is possible to over allocate virtual processors, however, over allocating has a significant, negative affect on guest and host performance due to processor context switching overheads.
-
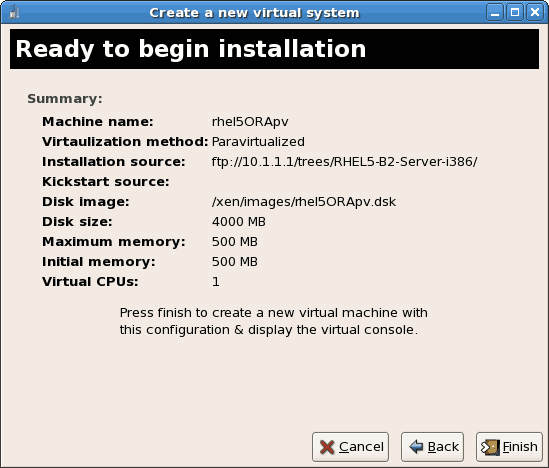
The ready to begin installation window presents a summary of all configuration information you entered. Review the information presented and use the
Back
button to make changes, if necessary. Once you are satisfied click the
Finish
button and to start the installation process.
A VNC window opens showing the start of the guest operating system installation process.